애플 로그인
Apple Sign In 키 발급 및 연동 방법
최종 수정: 2026-03-19
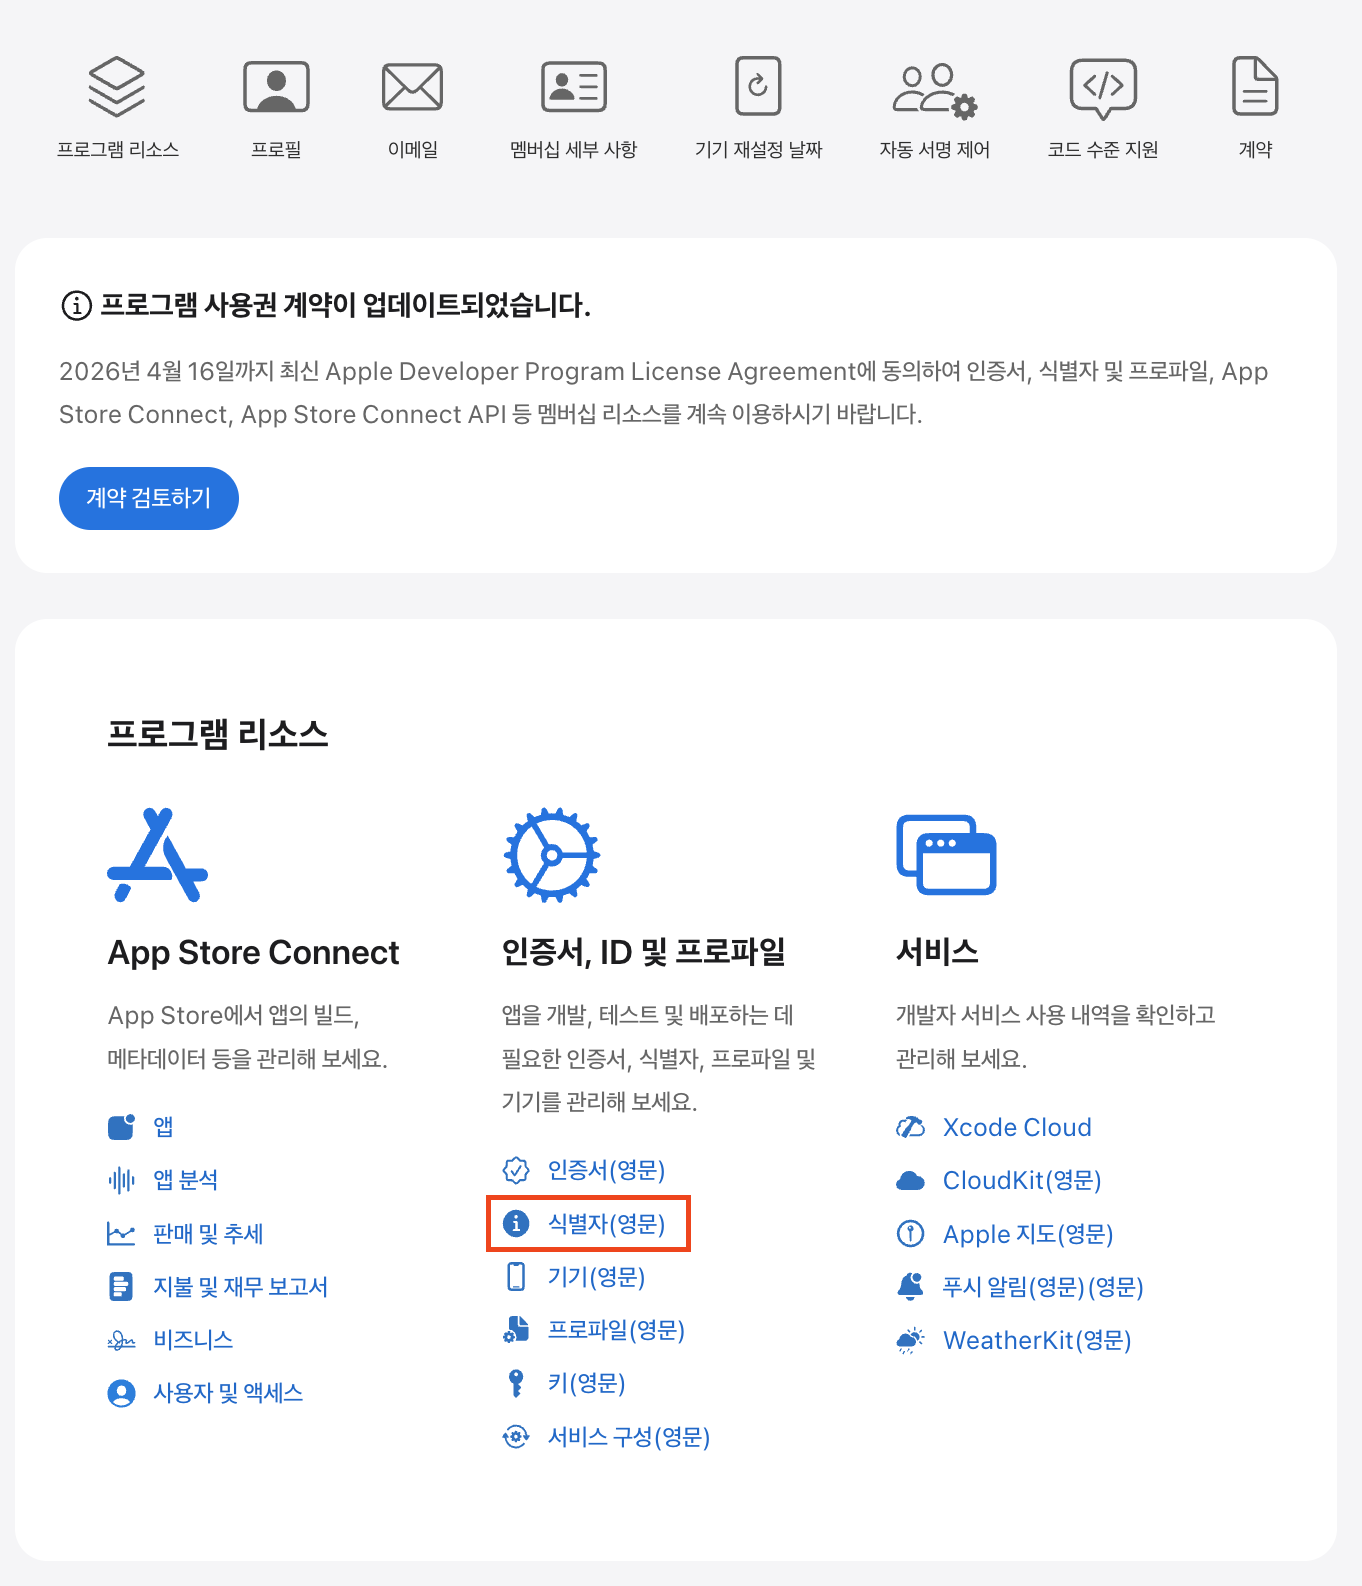
1단계: 로그인 후 '식별자(영문)' 클릭
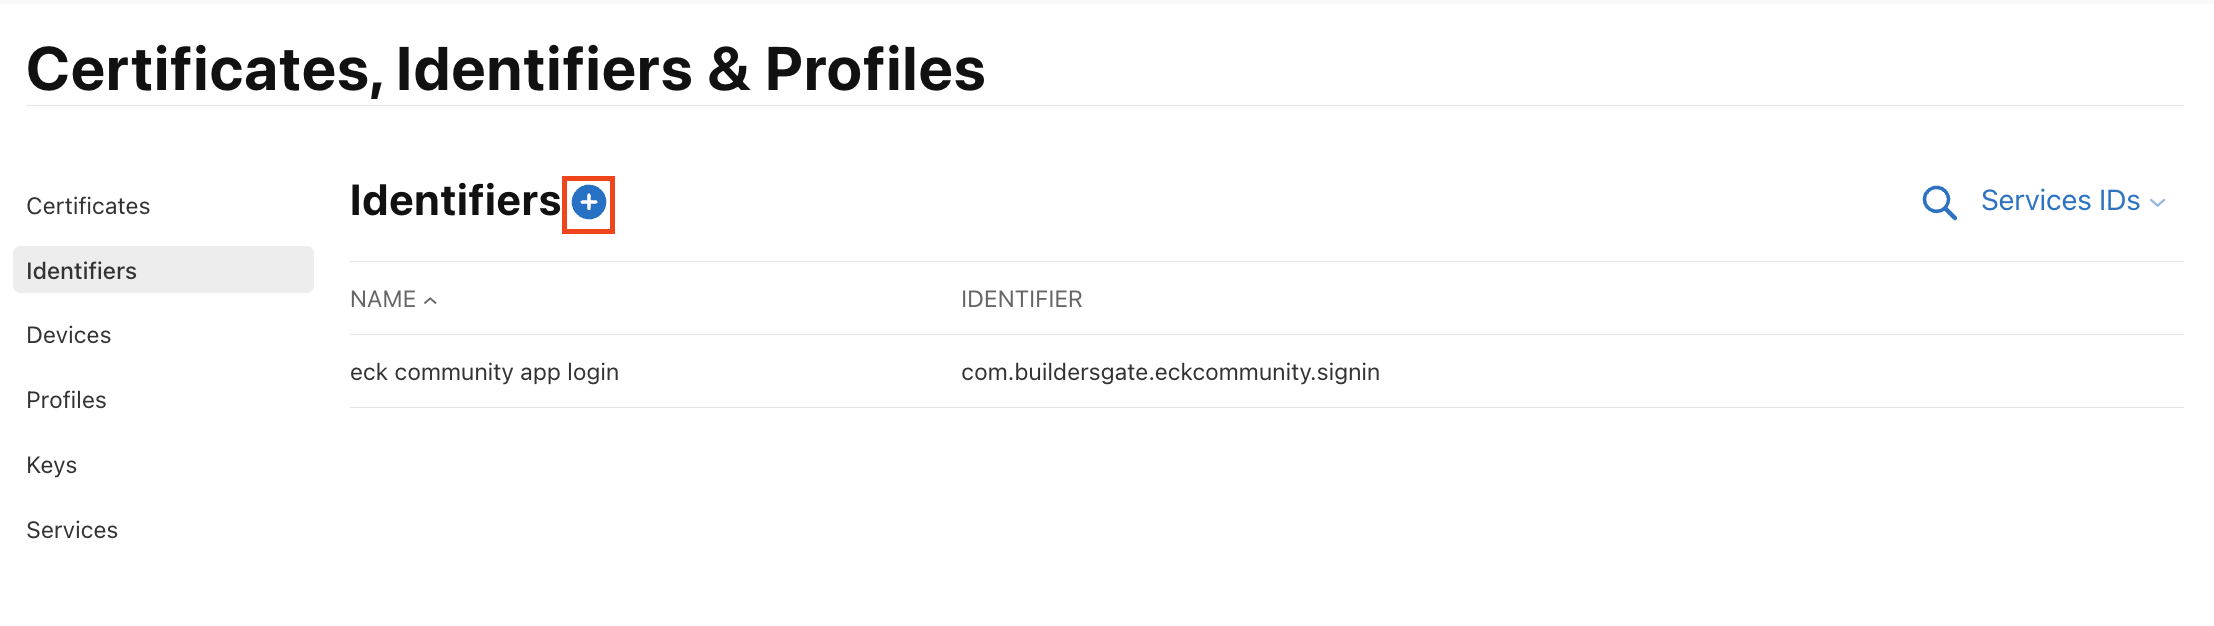
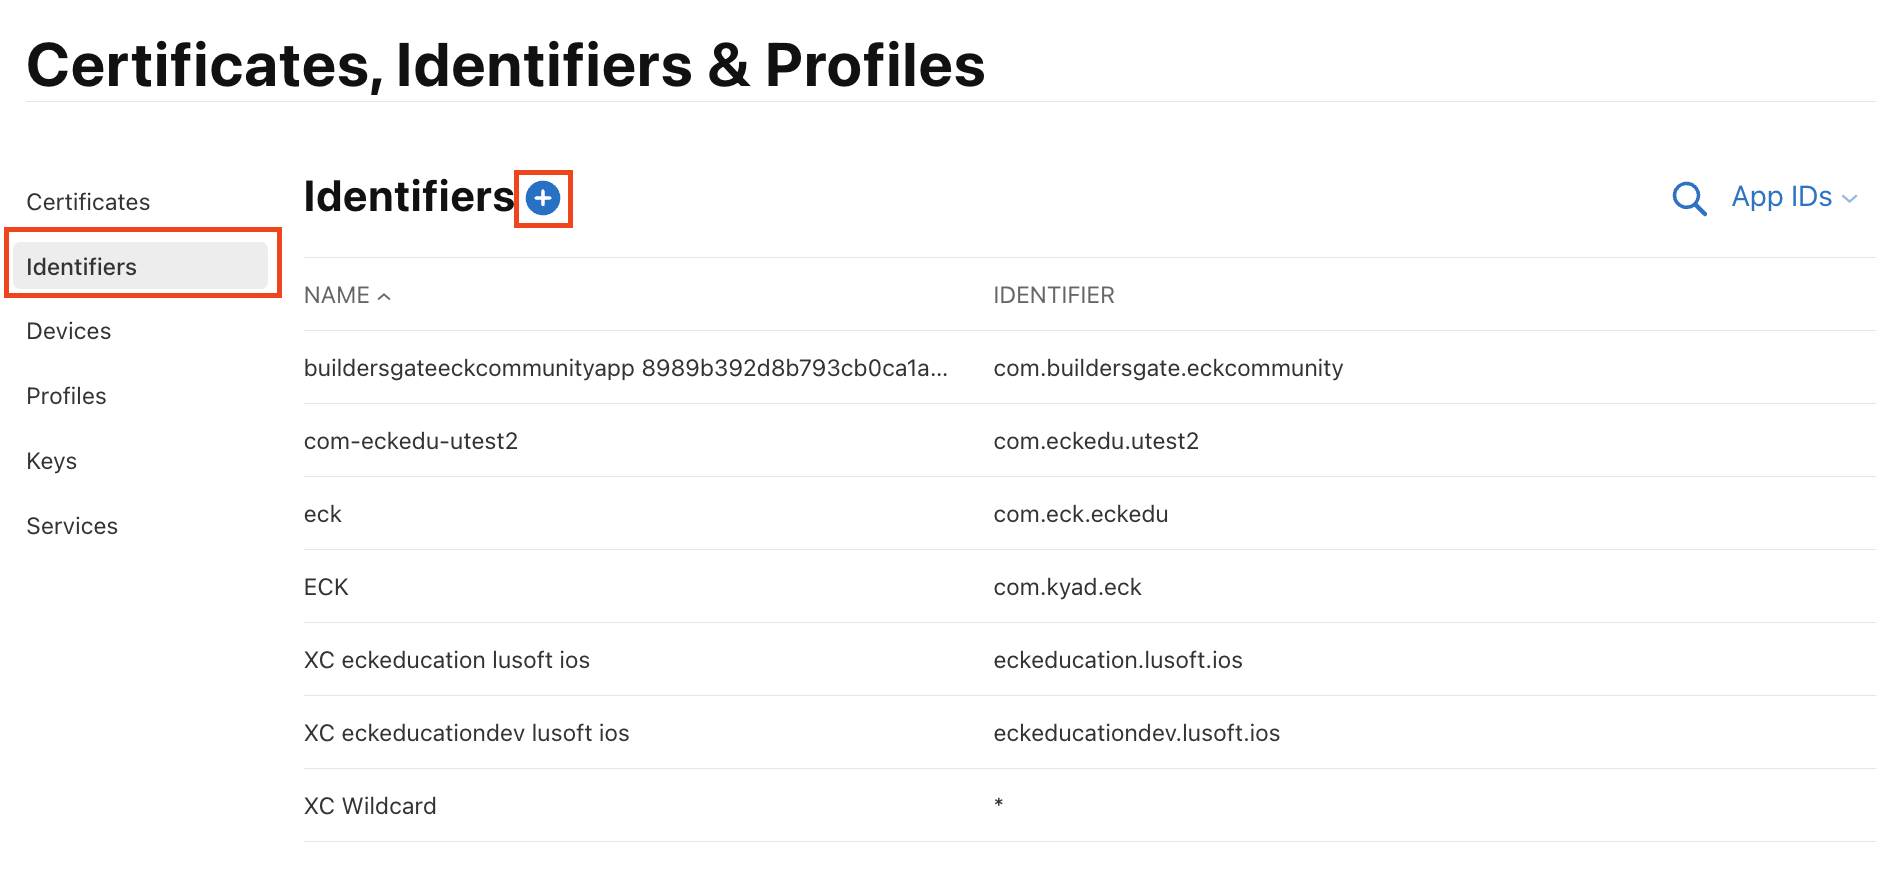
2단계: Identifieres - 파란색 + 버튼 클릭
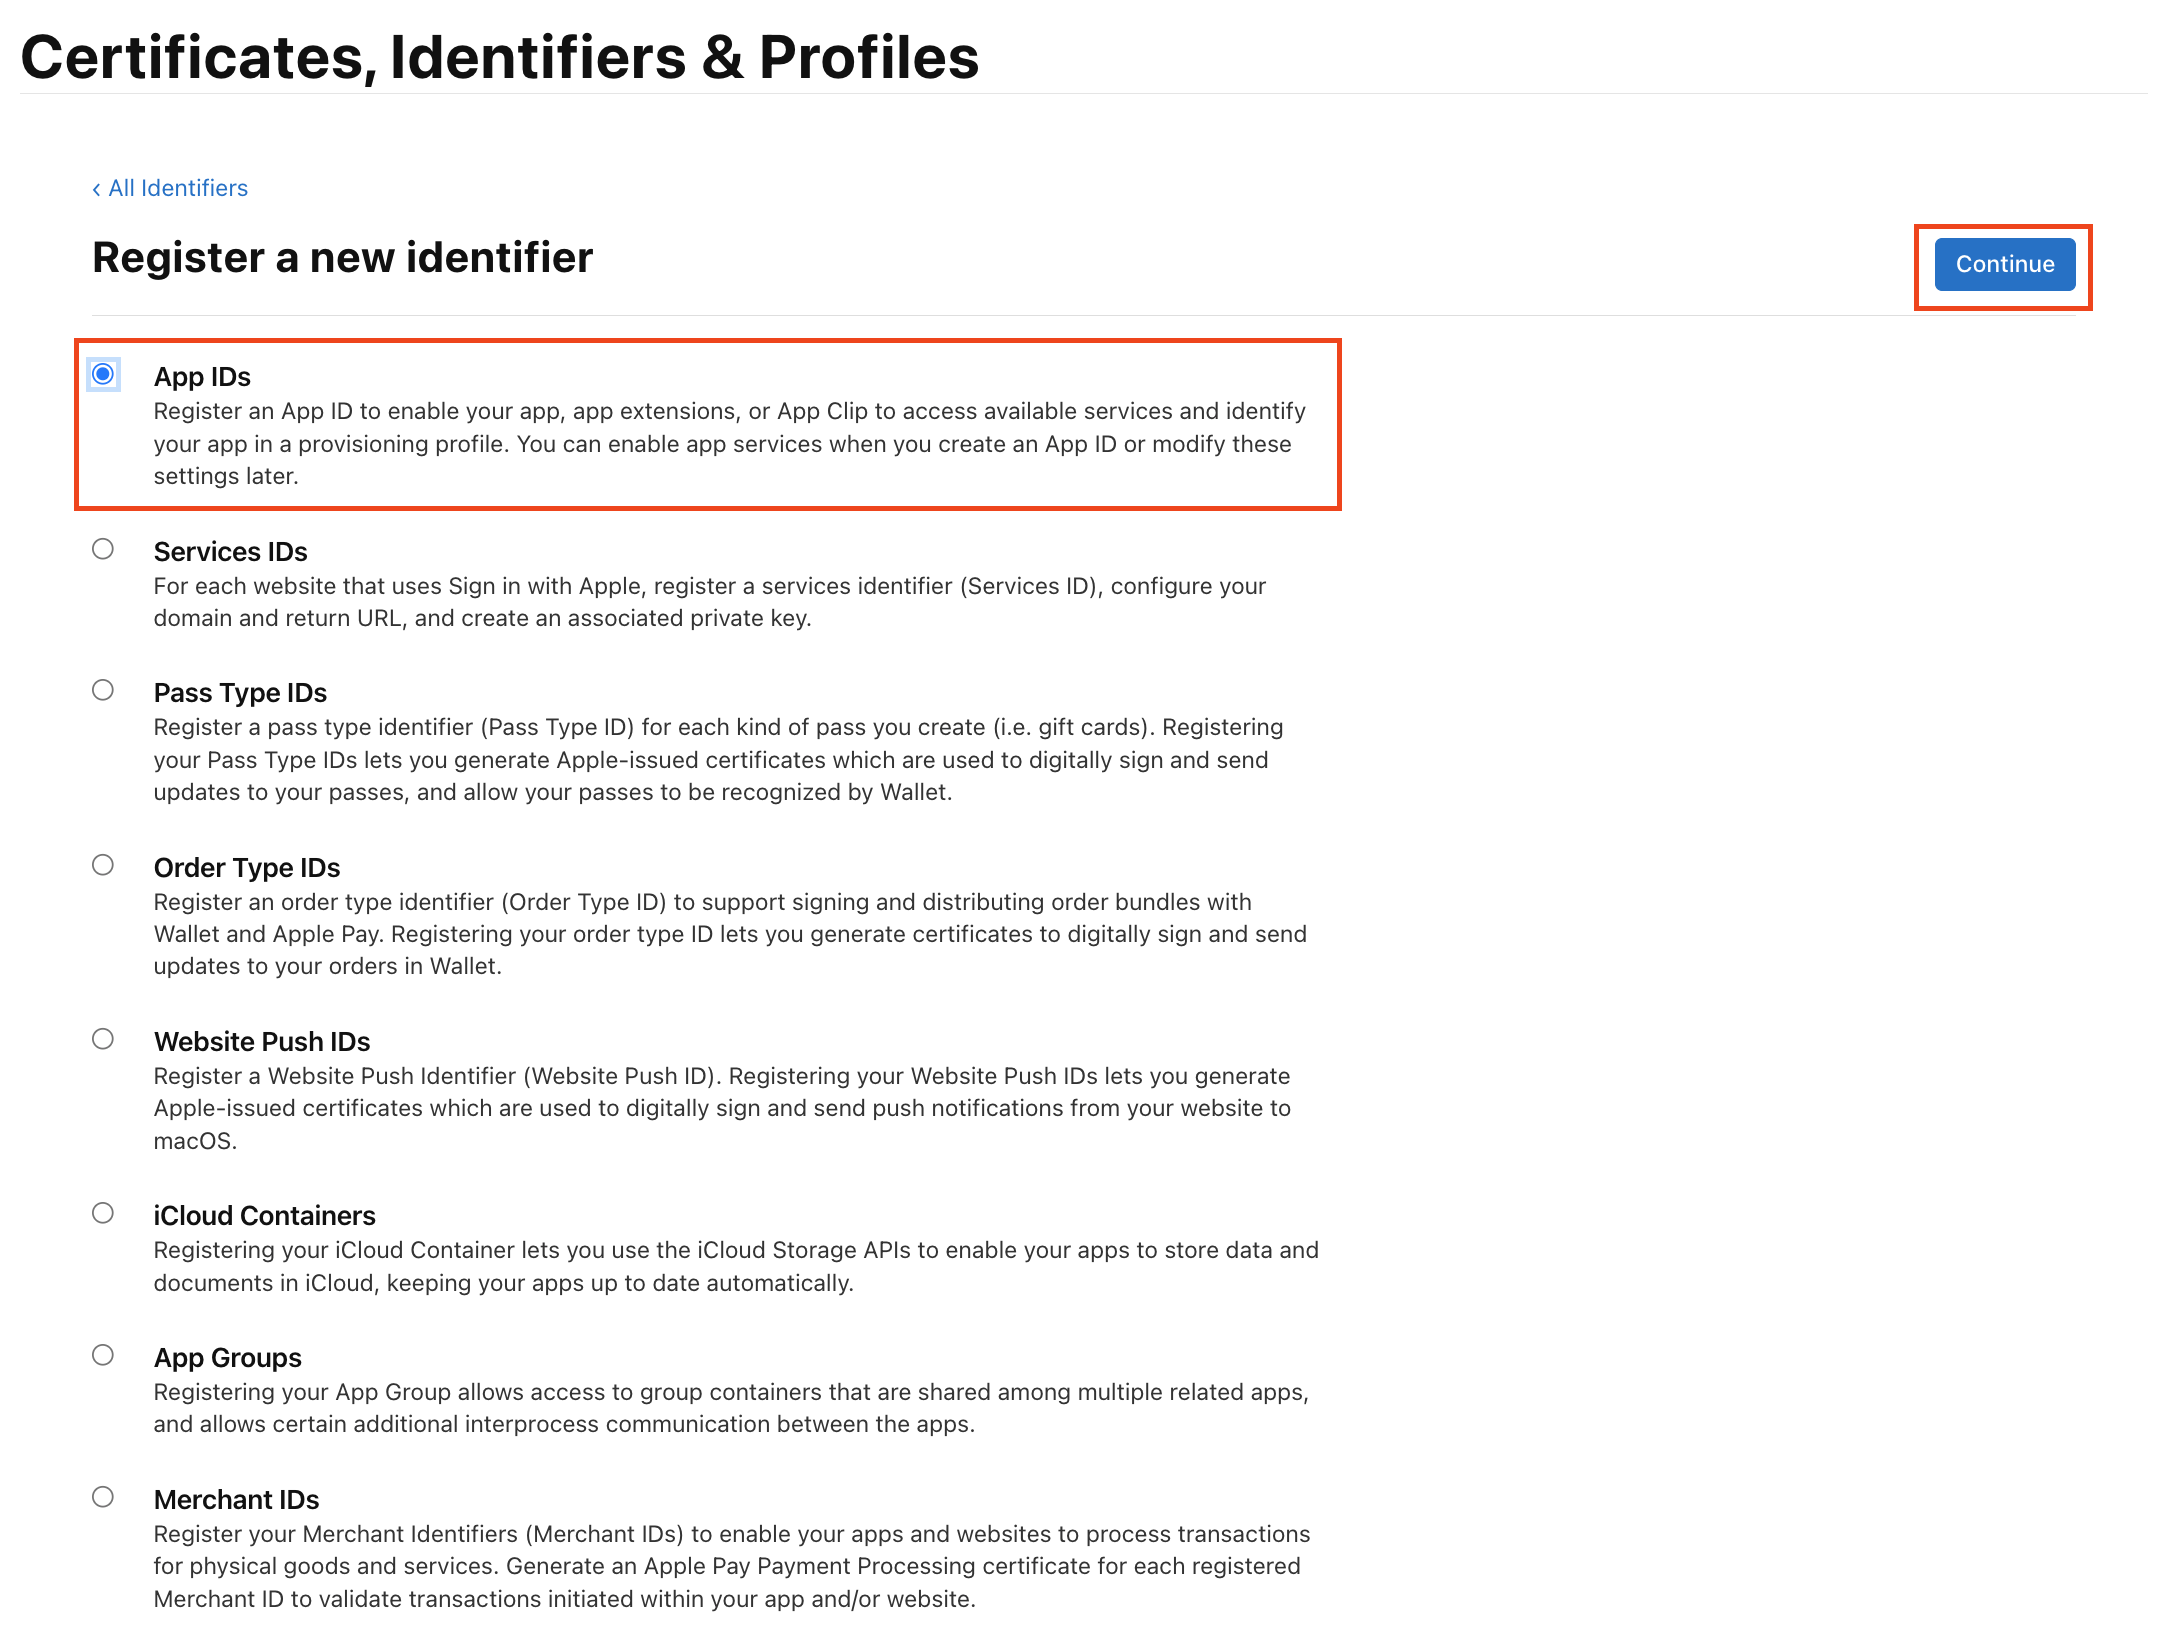
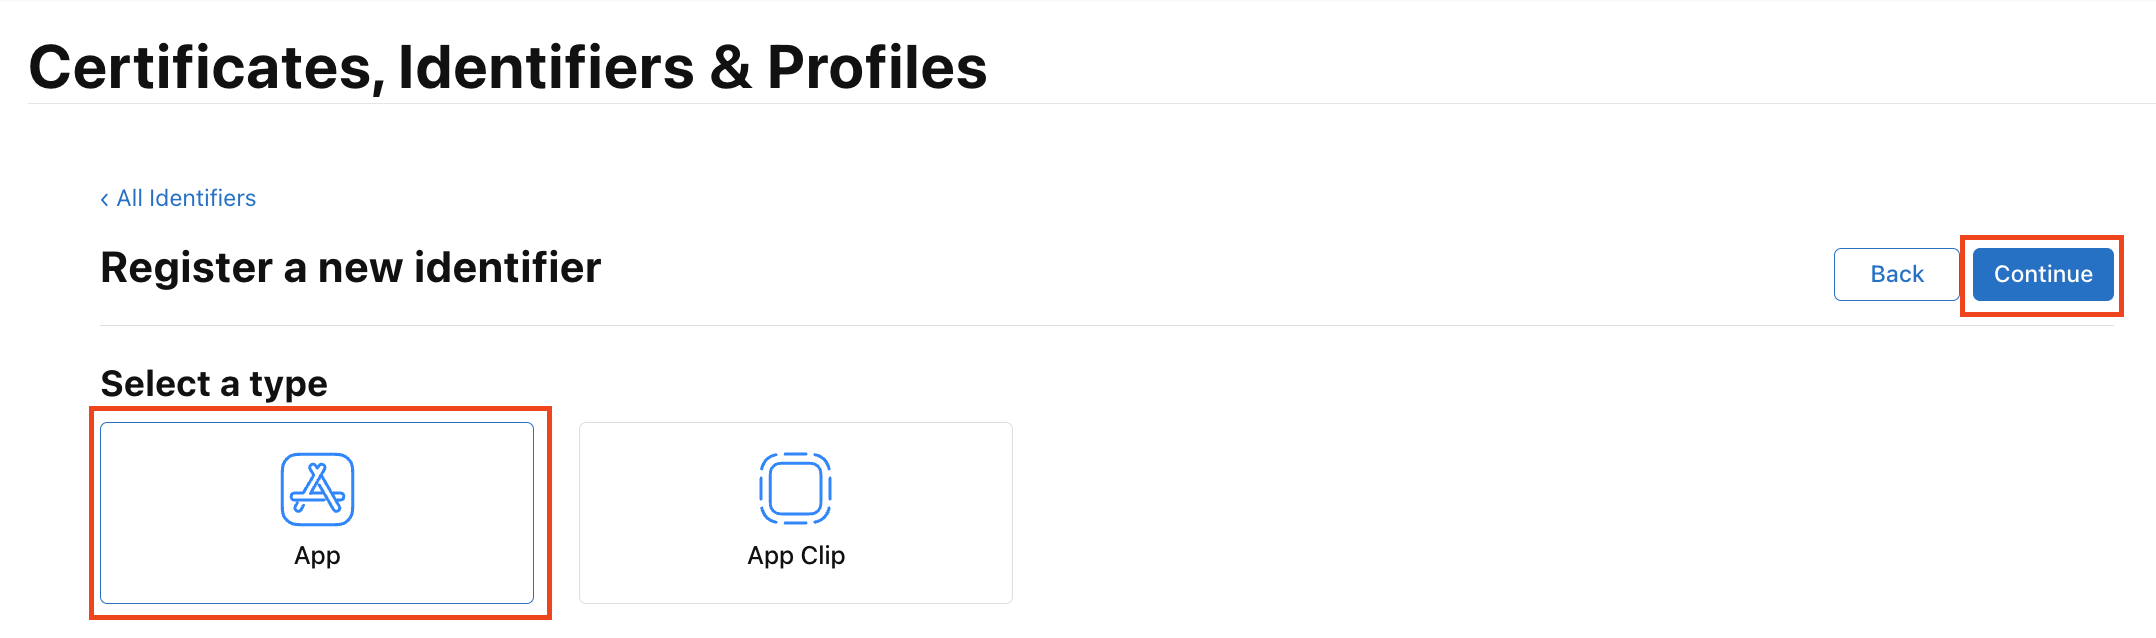
3단계: App IDs - Continue
4단계: App - Continue
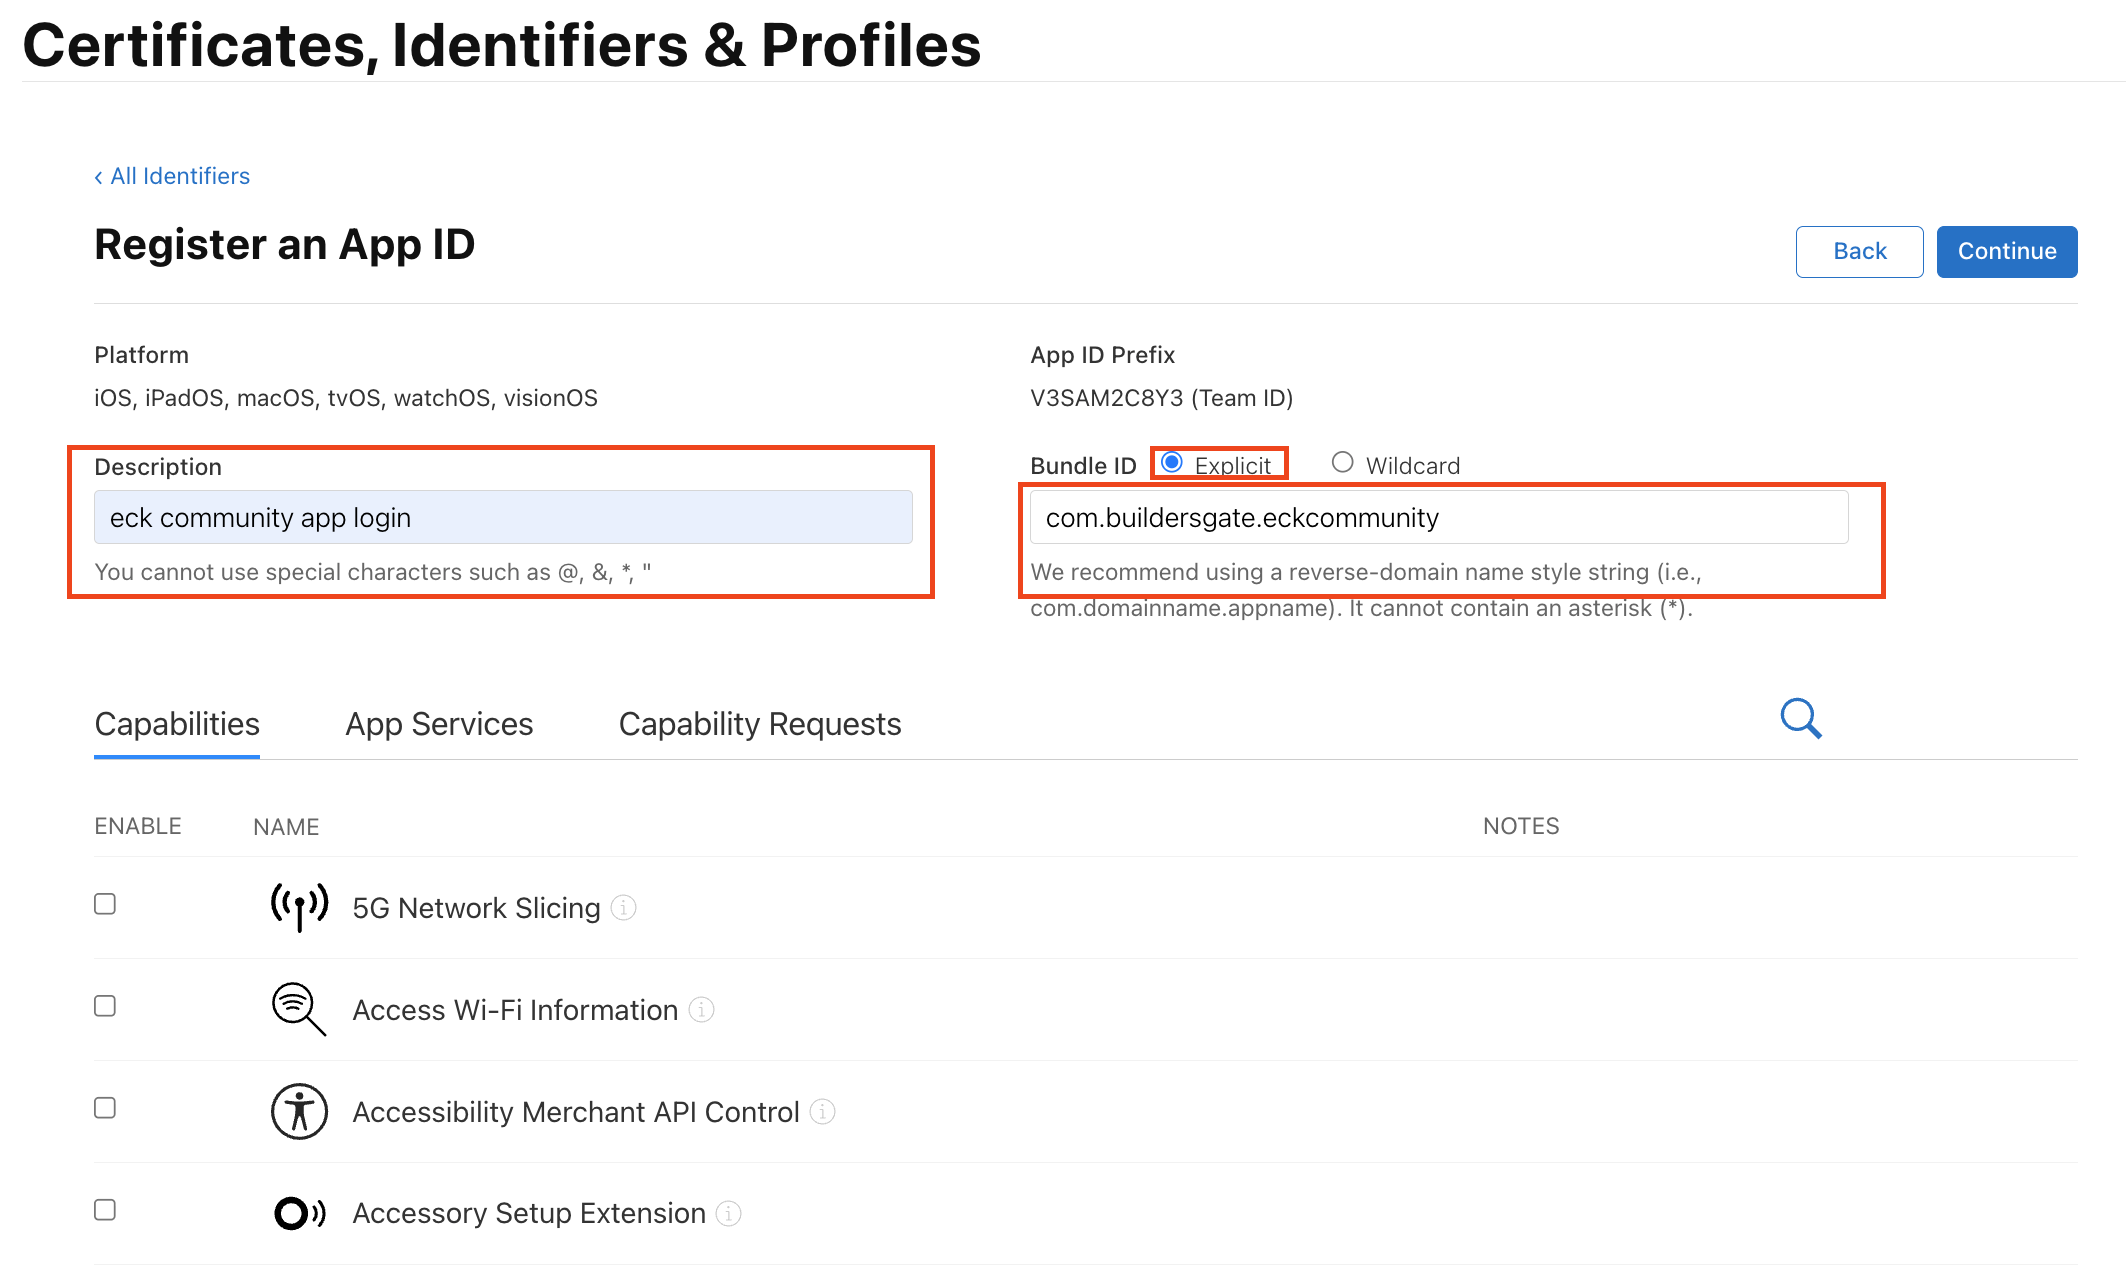
5단계: Description 입력 - Bundle ID: Explicit 선택 및 도메인 입력
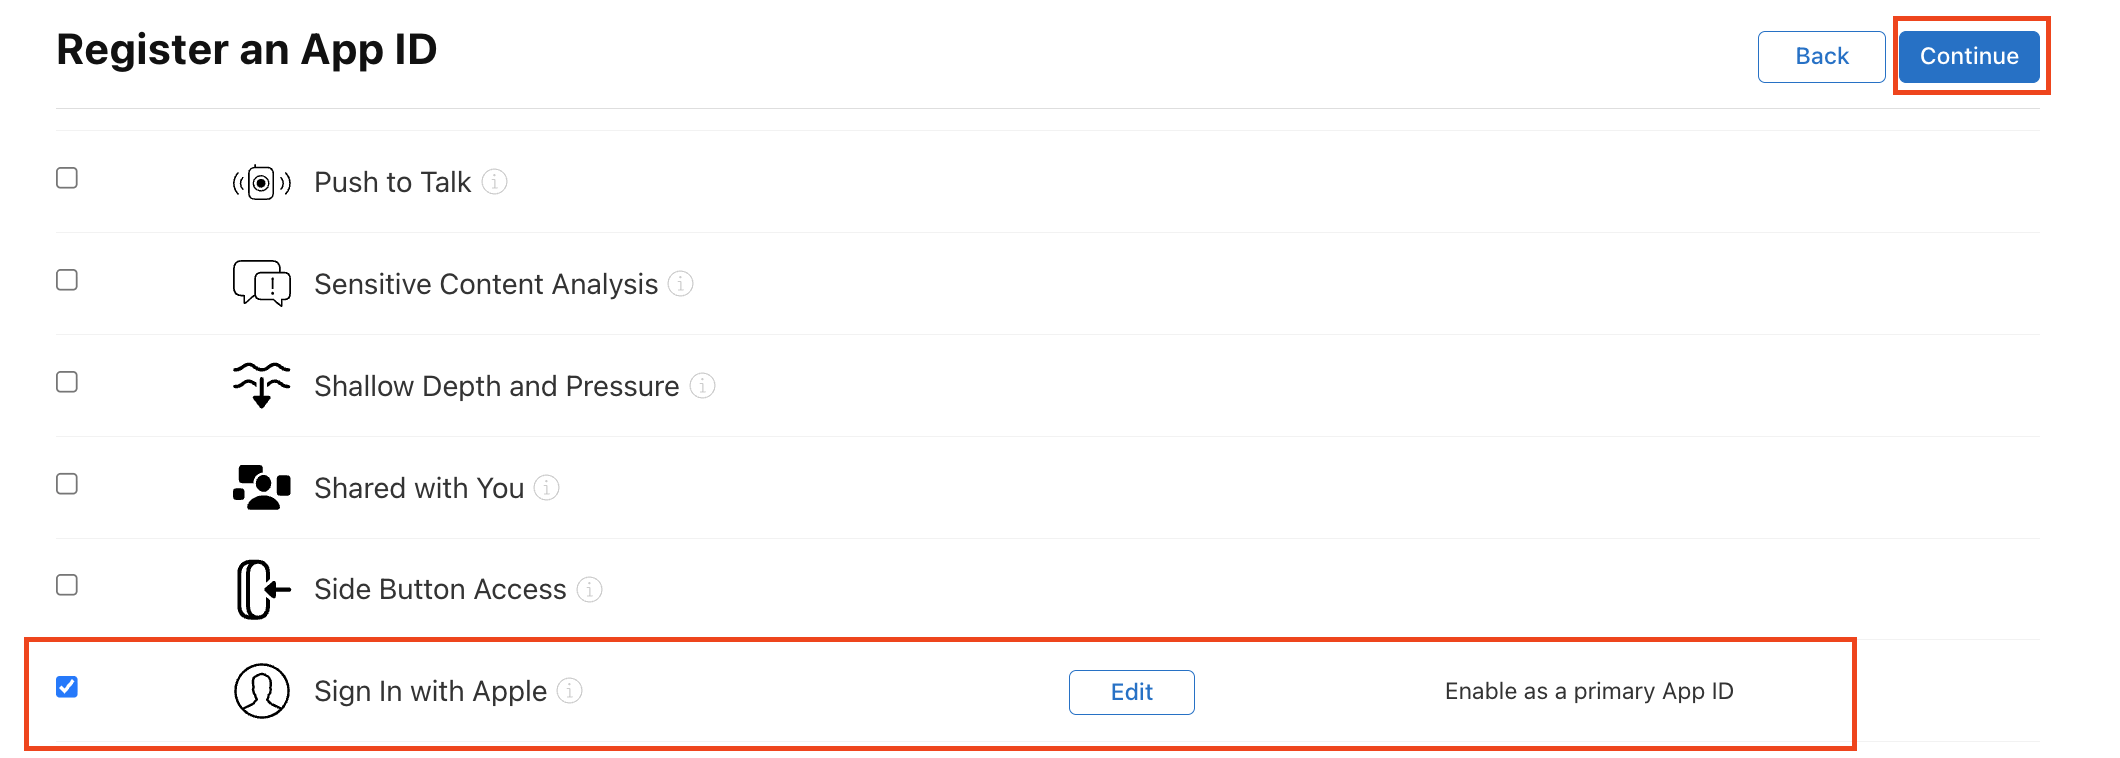
6단계: 스크롤 내려서 Sign in with Apple 체크 후 Continue
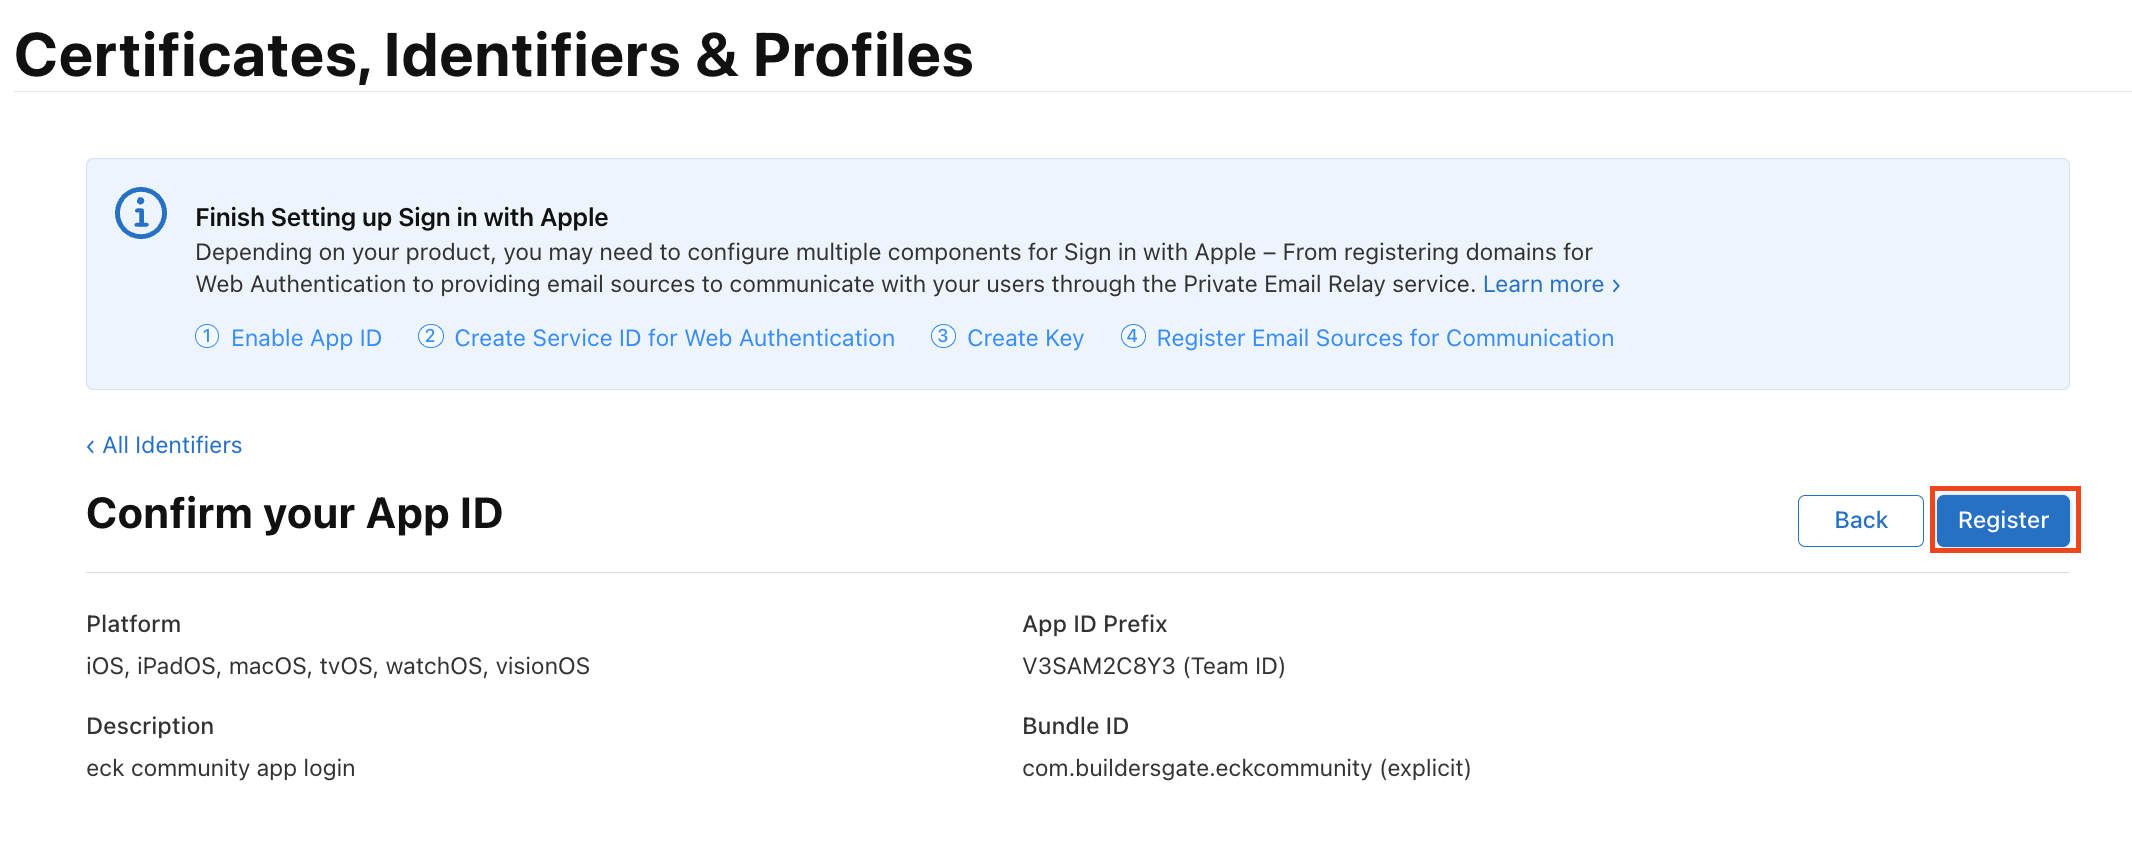
7단계: Resgister
8단계: Identifieres - 파란색 + 버튼 클릭
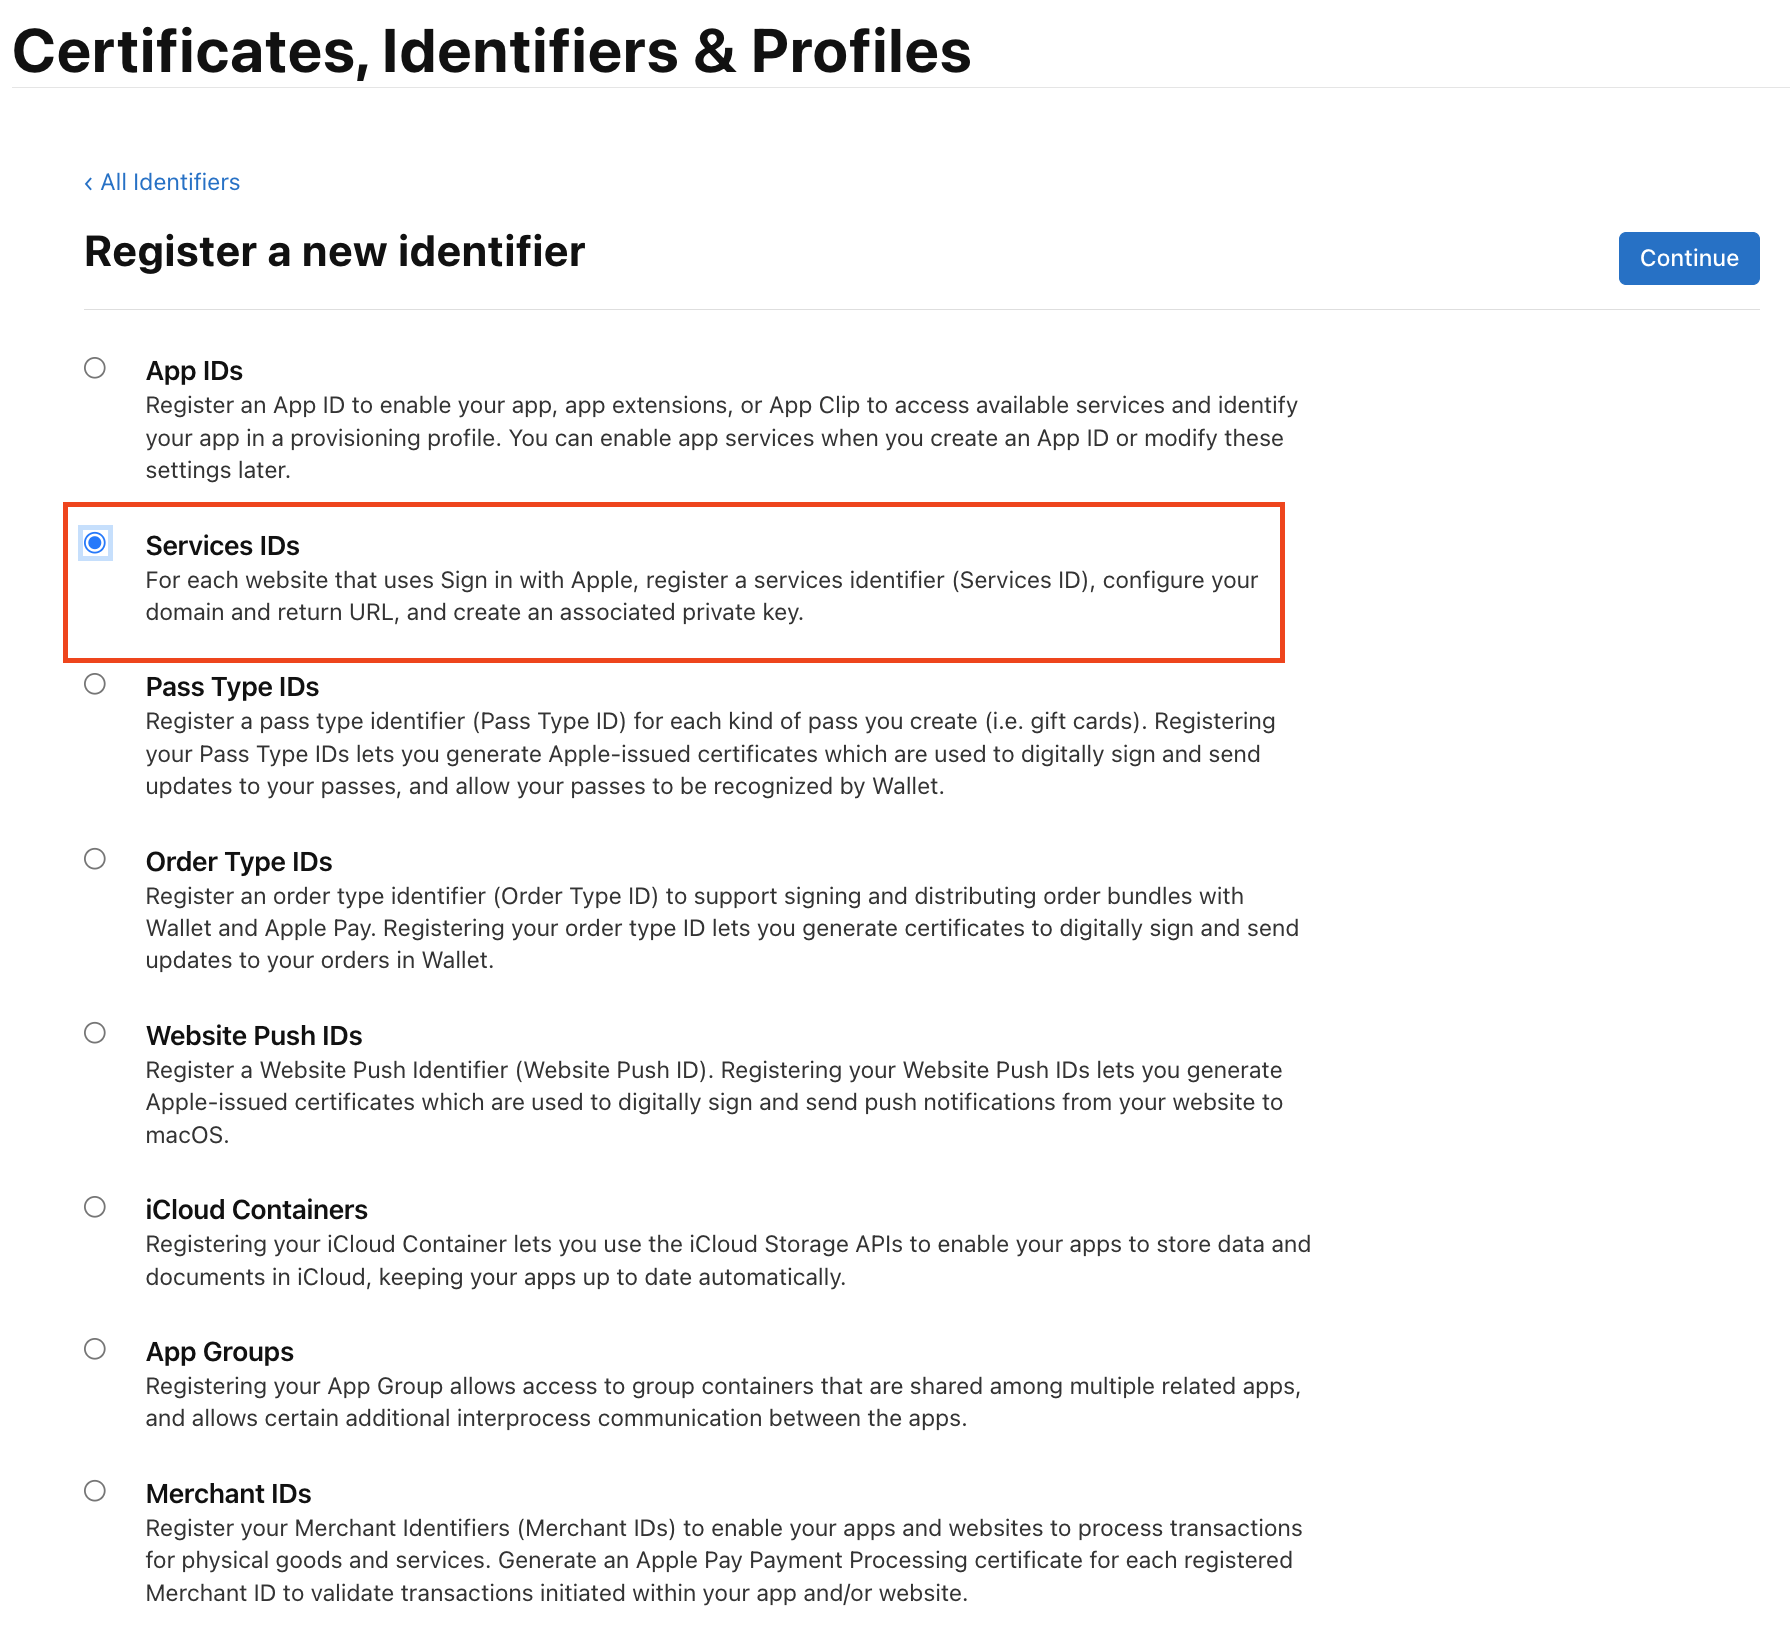
9단계: Services IDs - Continue
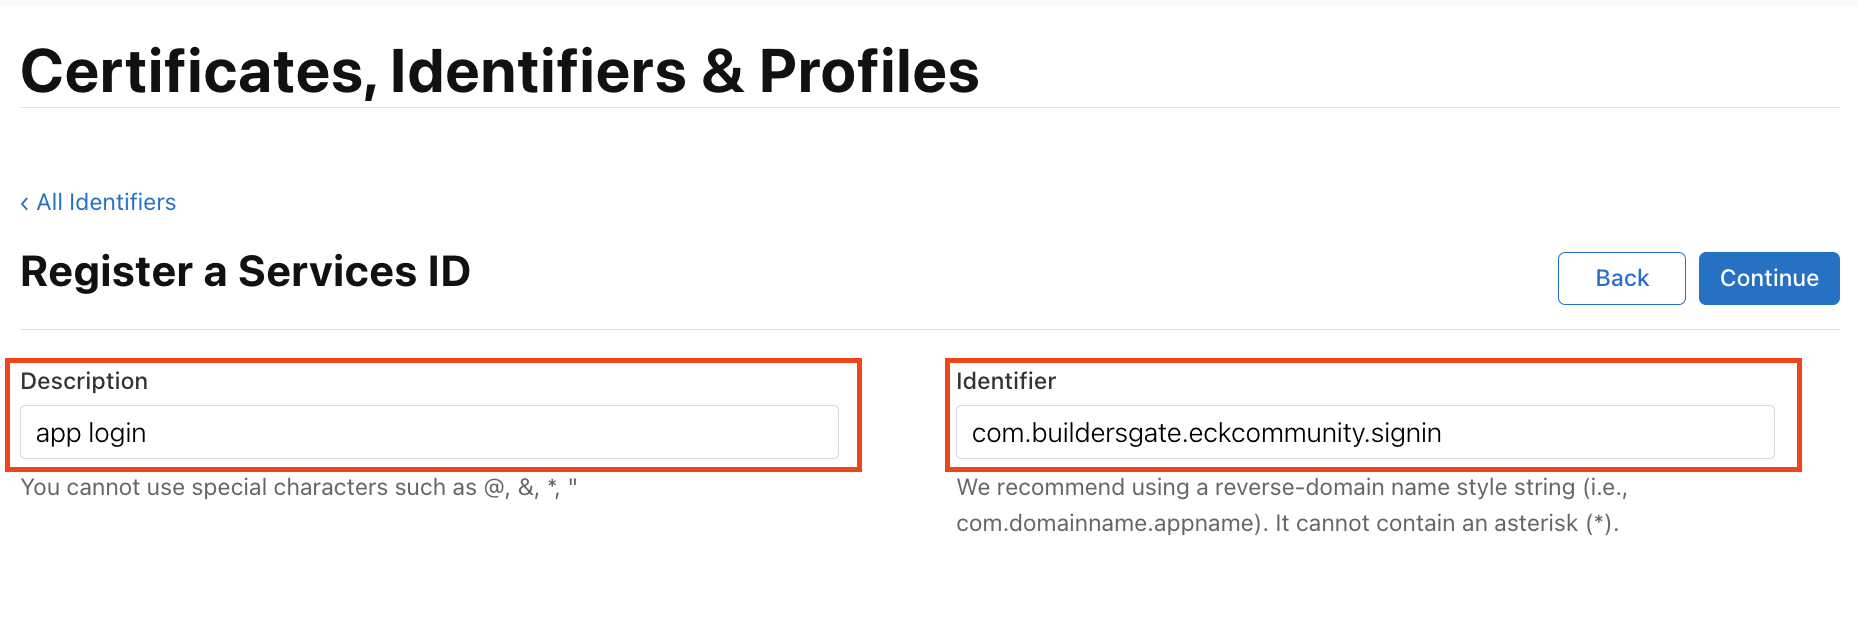
10단계: Description 입력 - Identifier 도메인 입력 - Continue
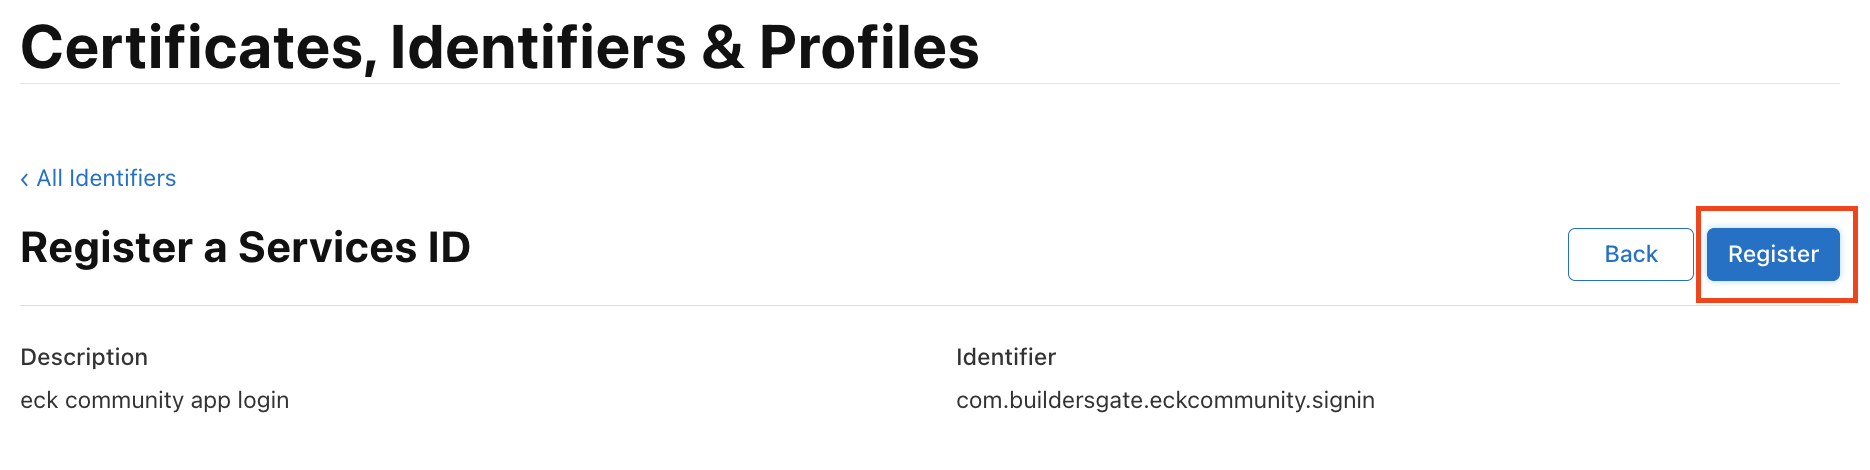
11단계: Register
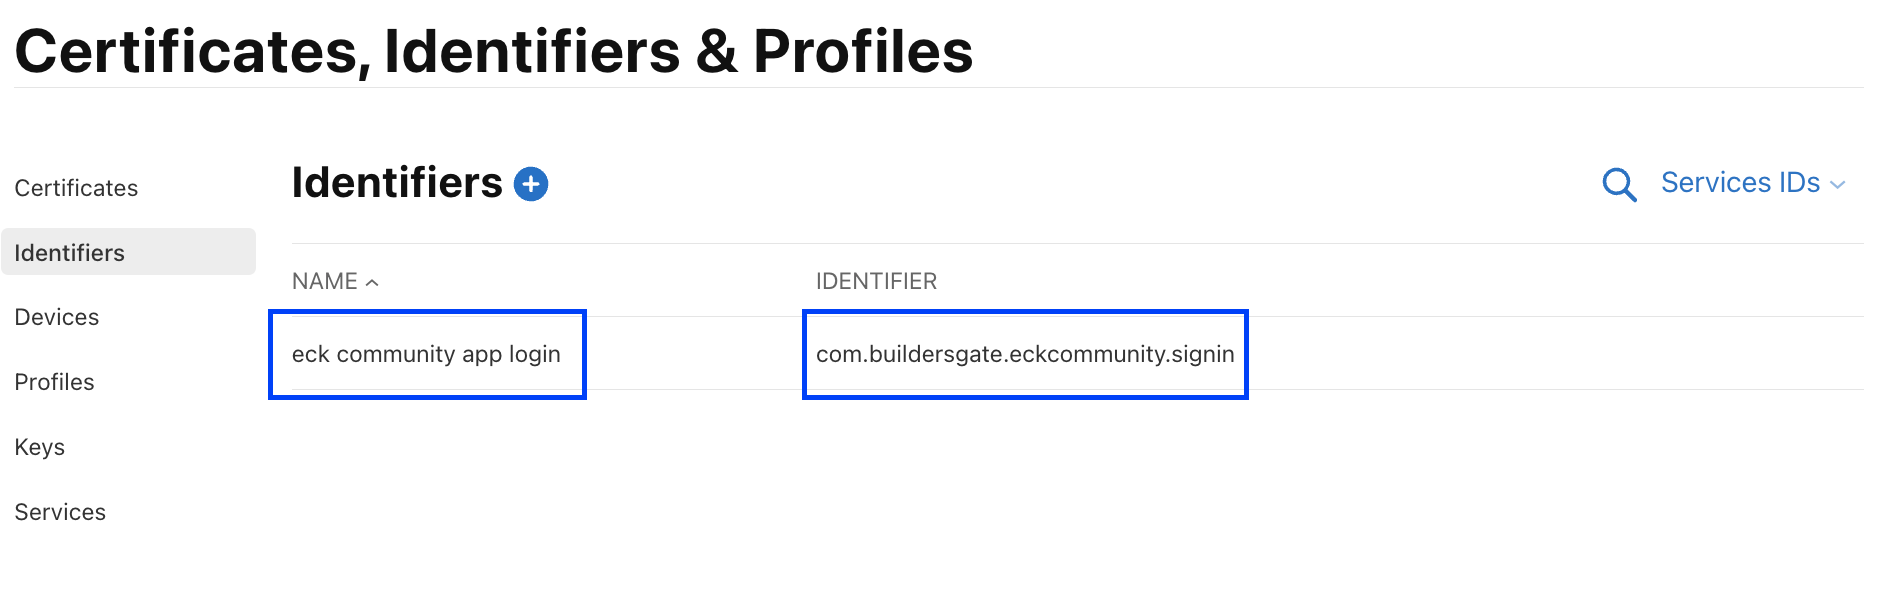
12단계: NAME과 IDENTIFIER 확인
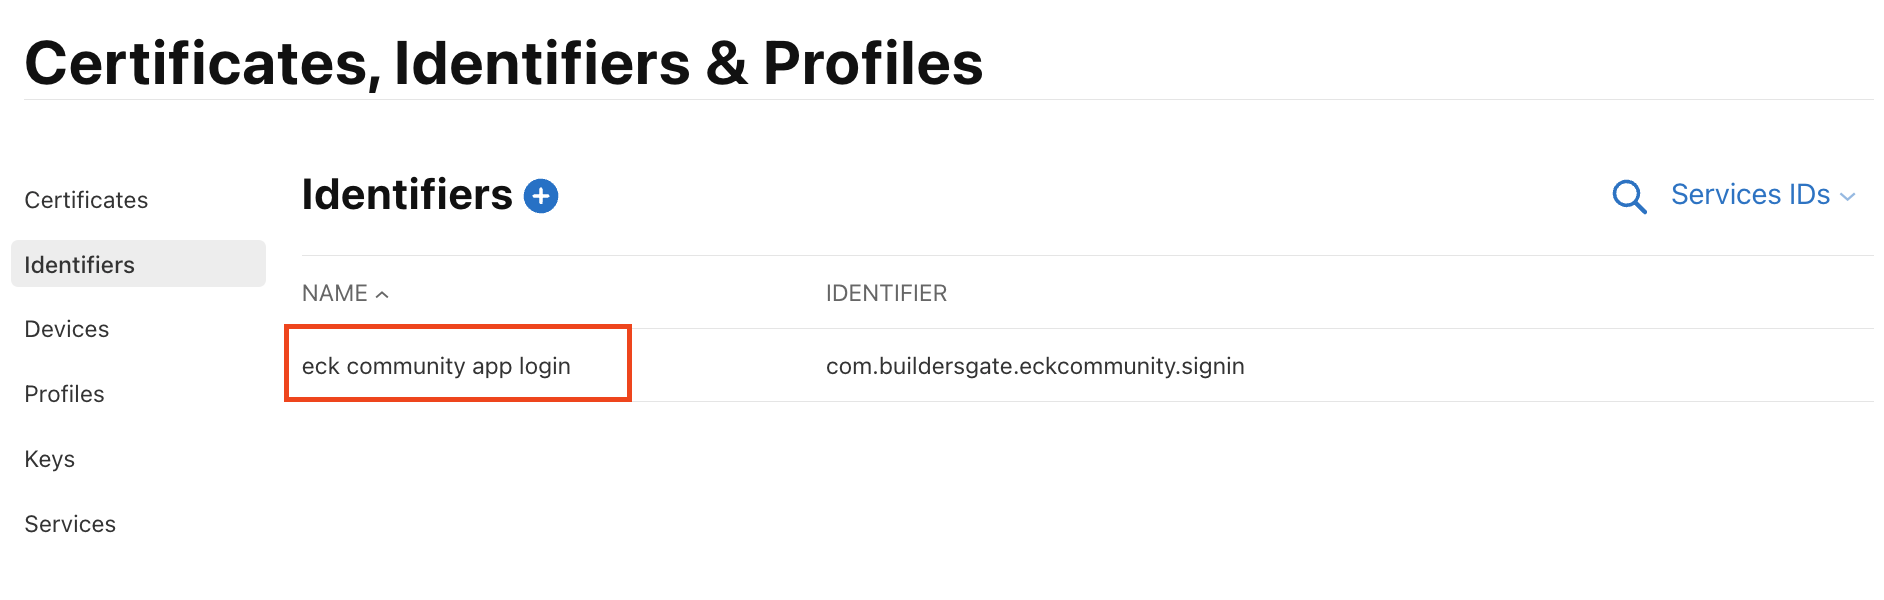
13단계: IDENTIFIER 클릭
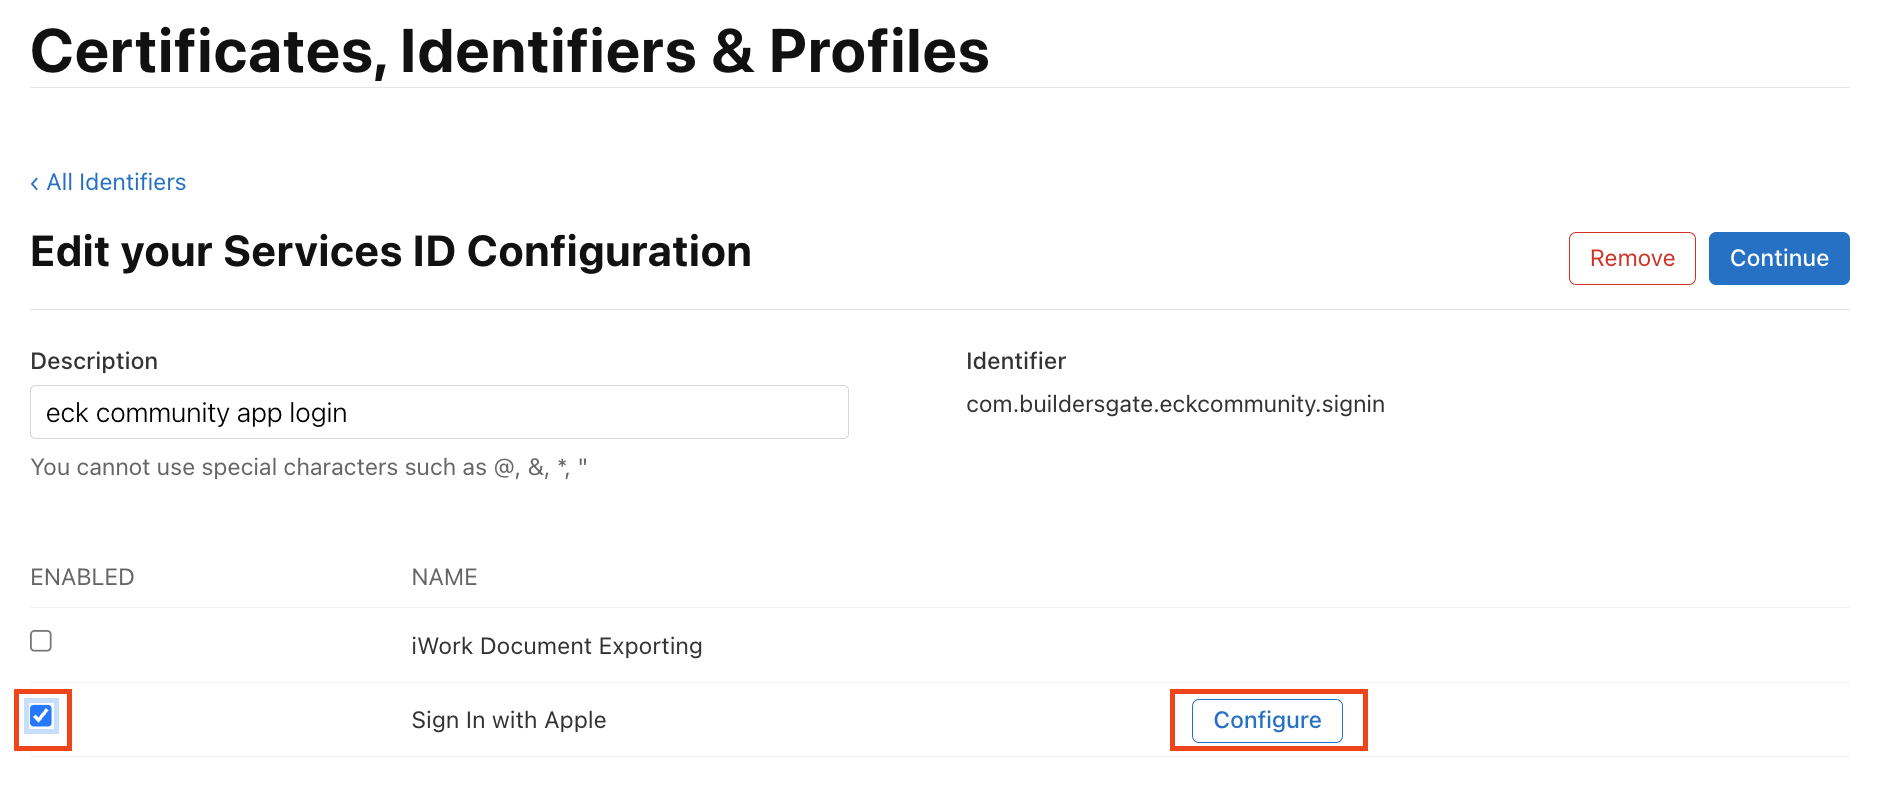
14단계: Sign in with Apple 체크 및 Configure 클릭
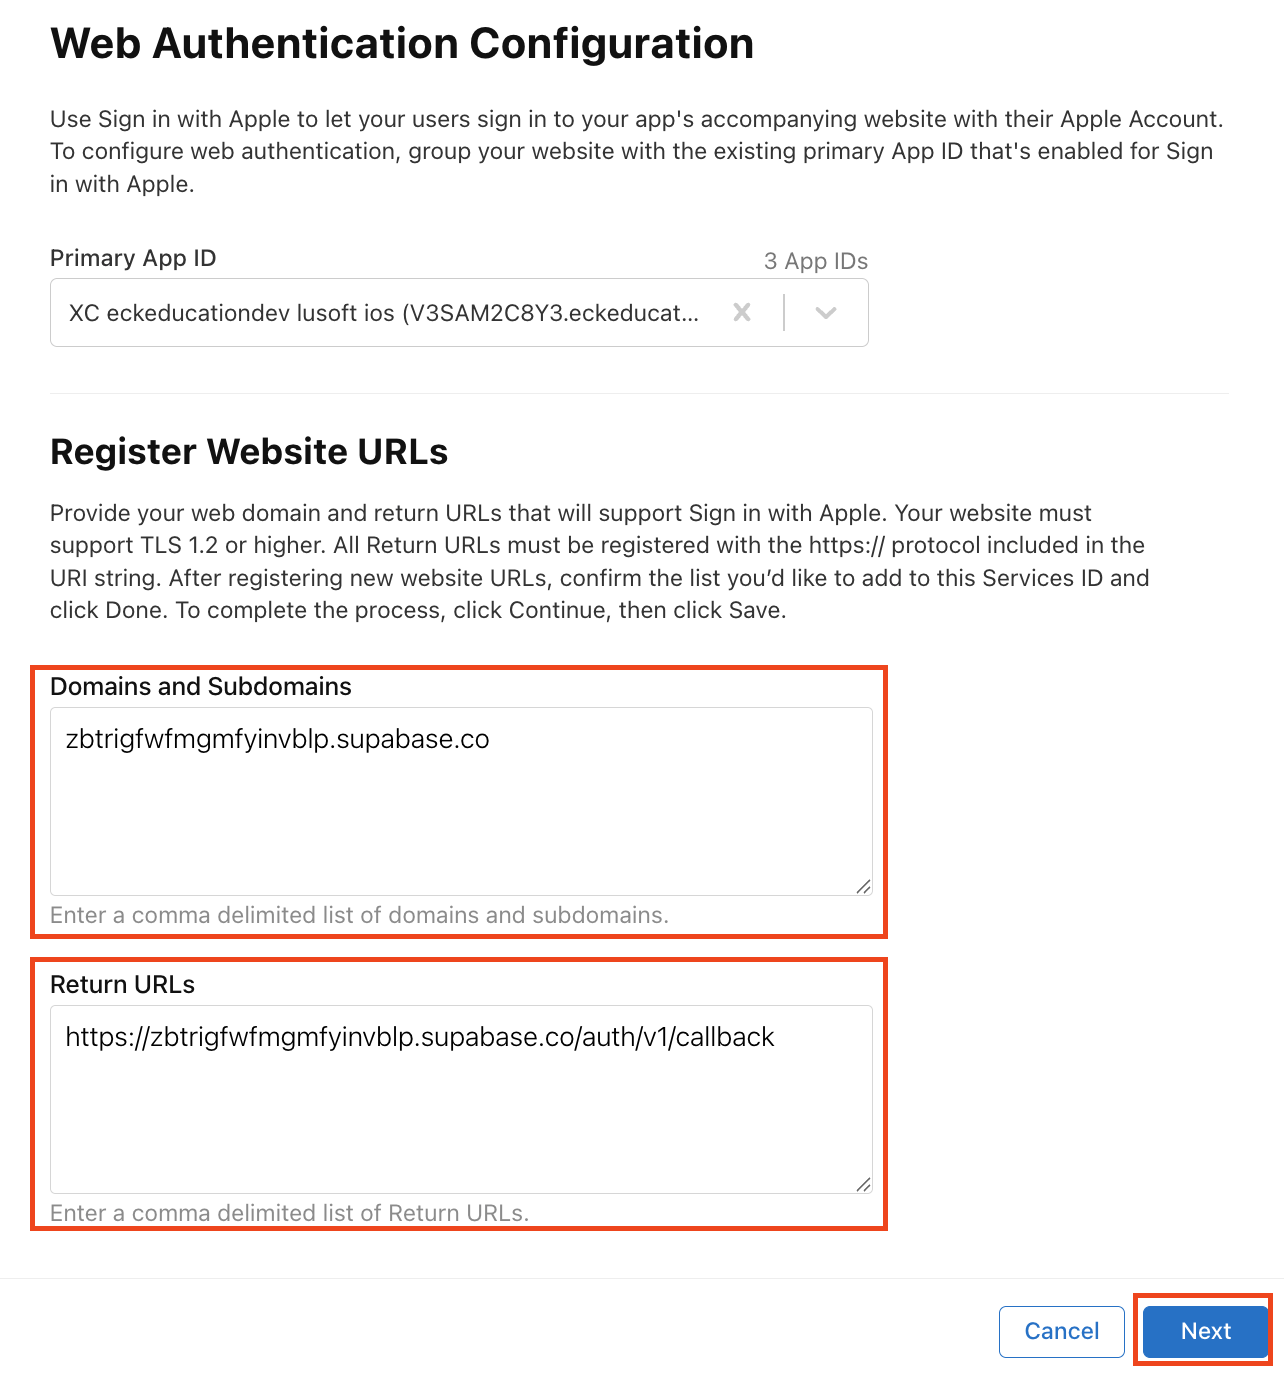
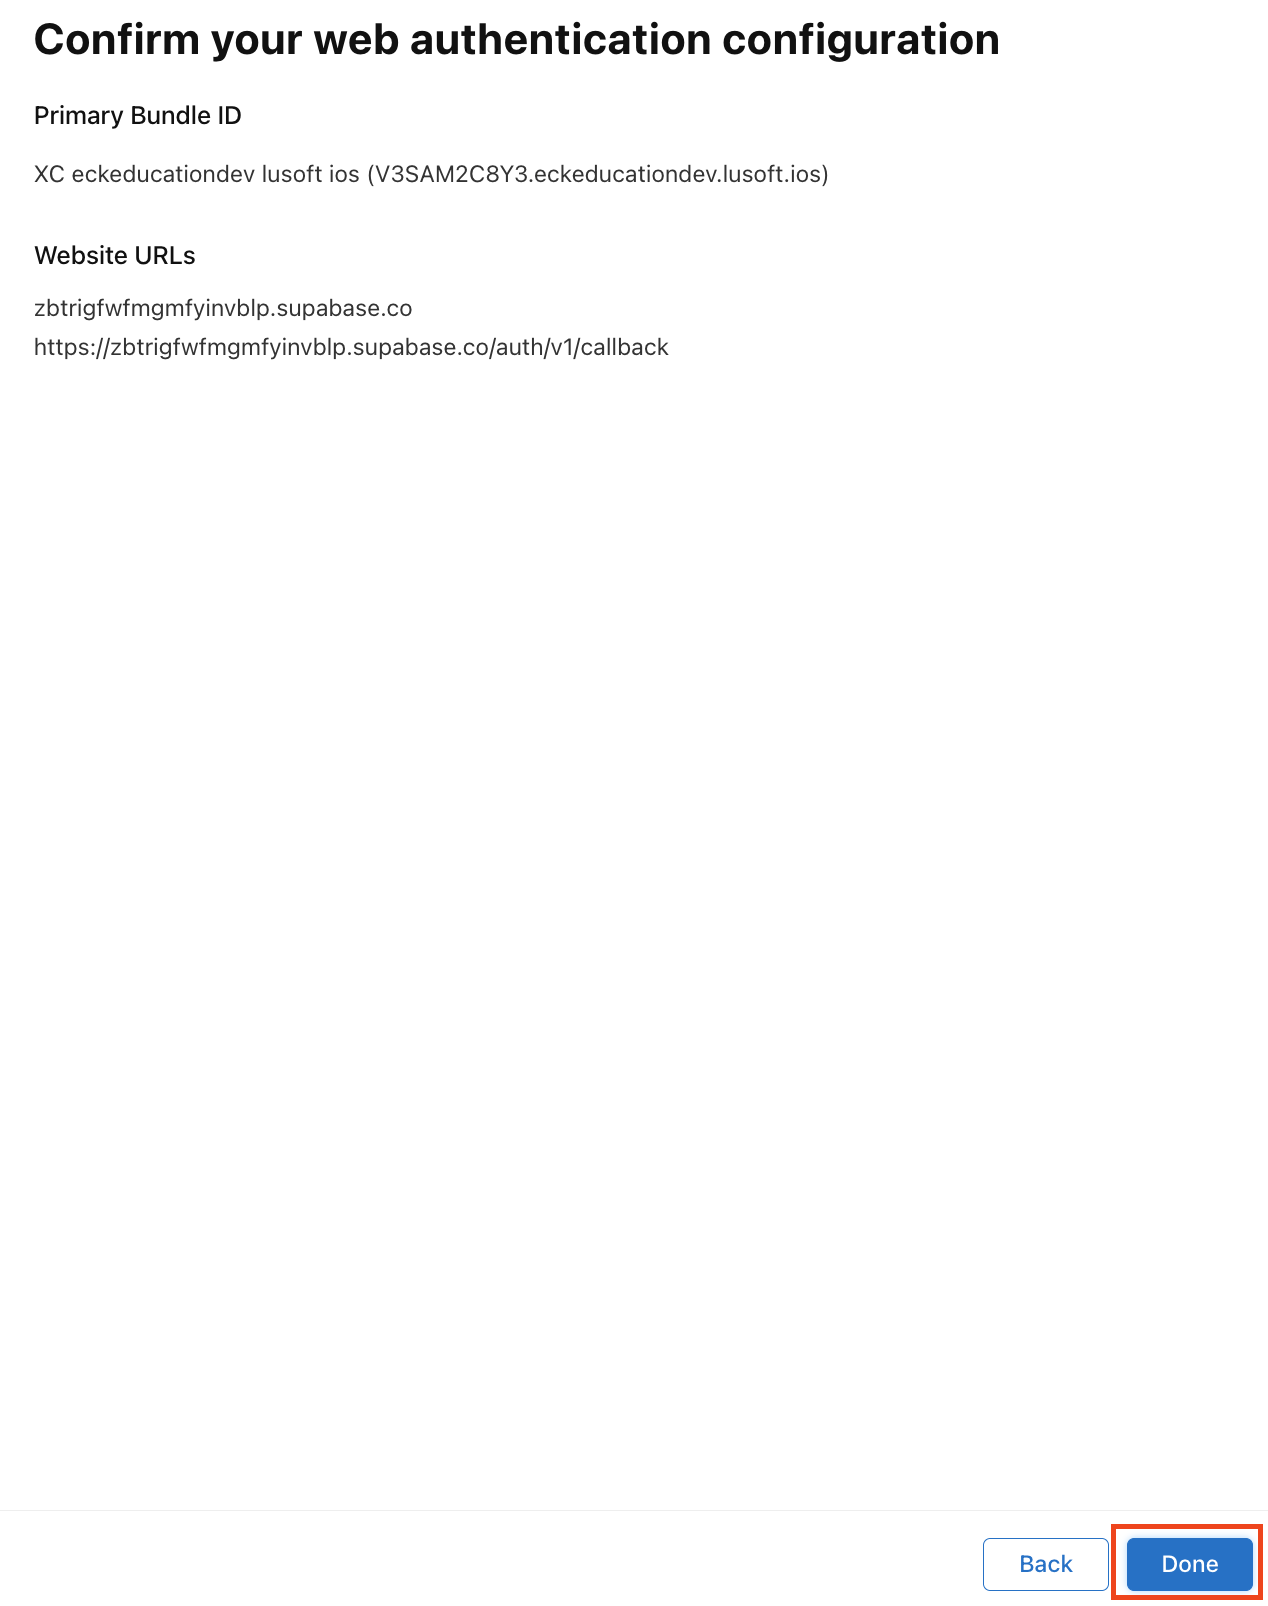
15단계: Primary App ID를 이전에 생성한 App ID 선택 - Domains and Subdomains 및 Return URLs 입력
16단계: Done
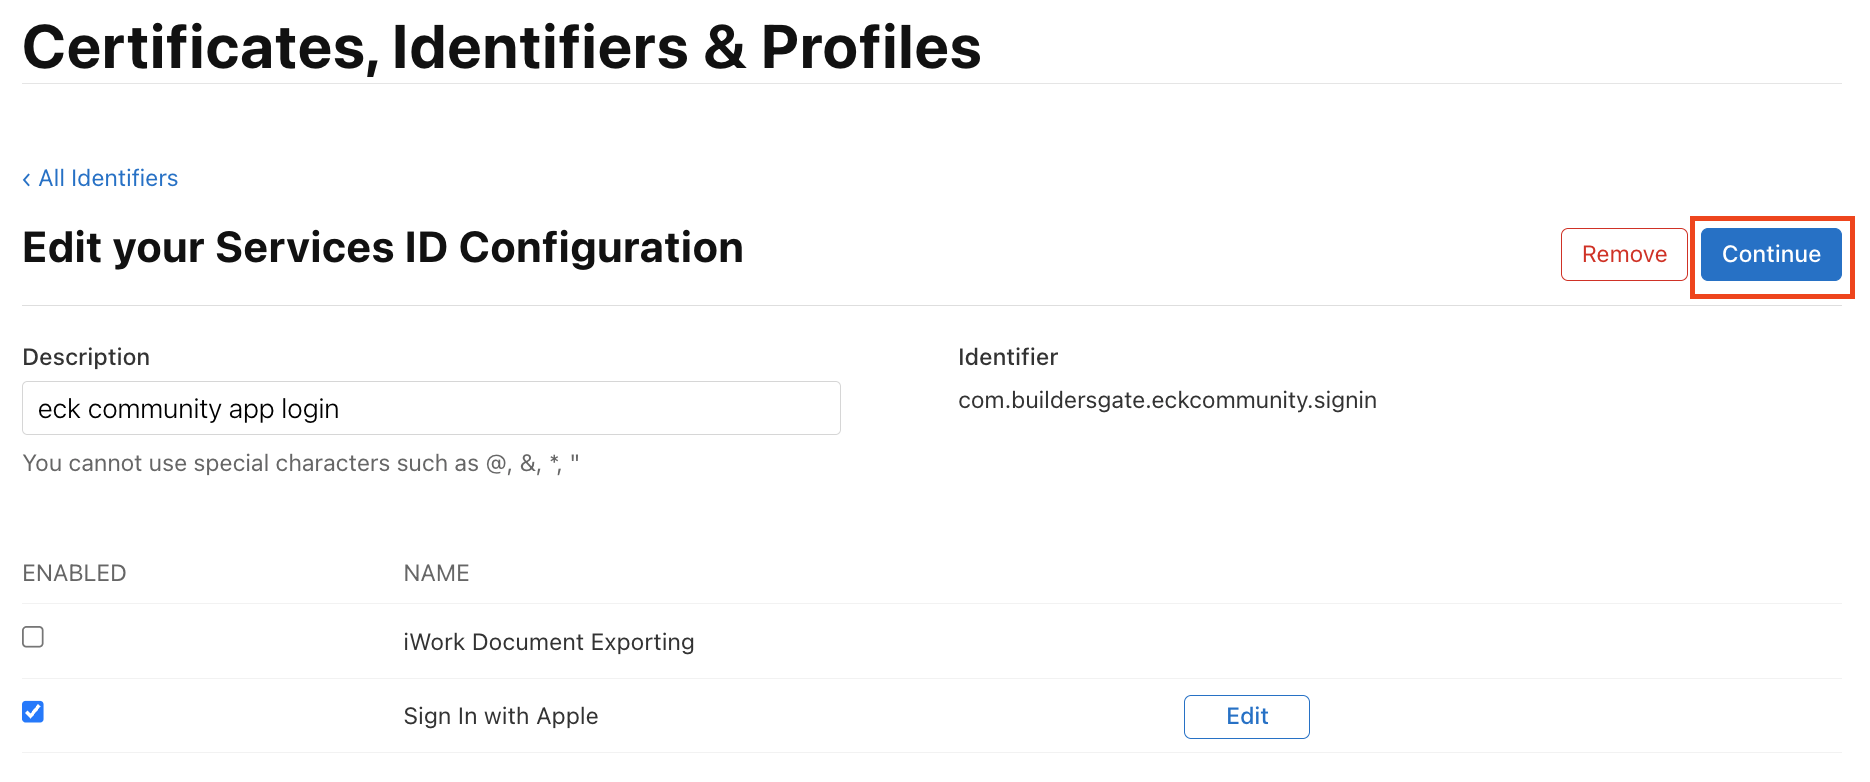
17단계: Continue
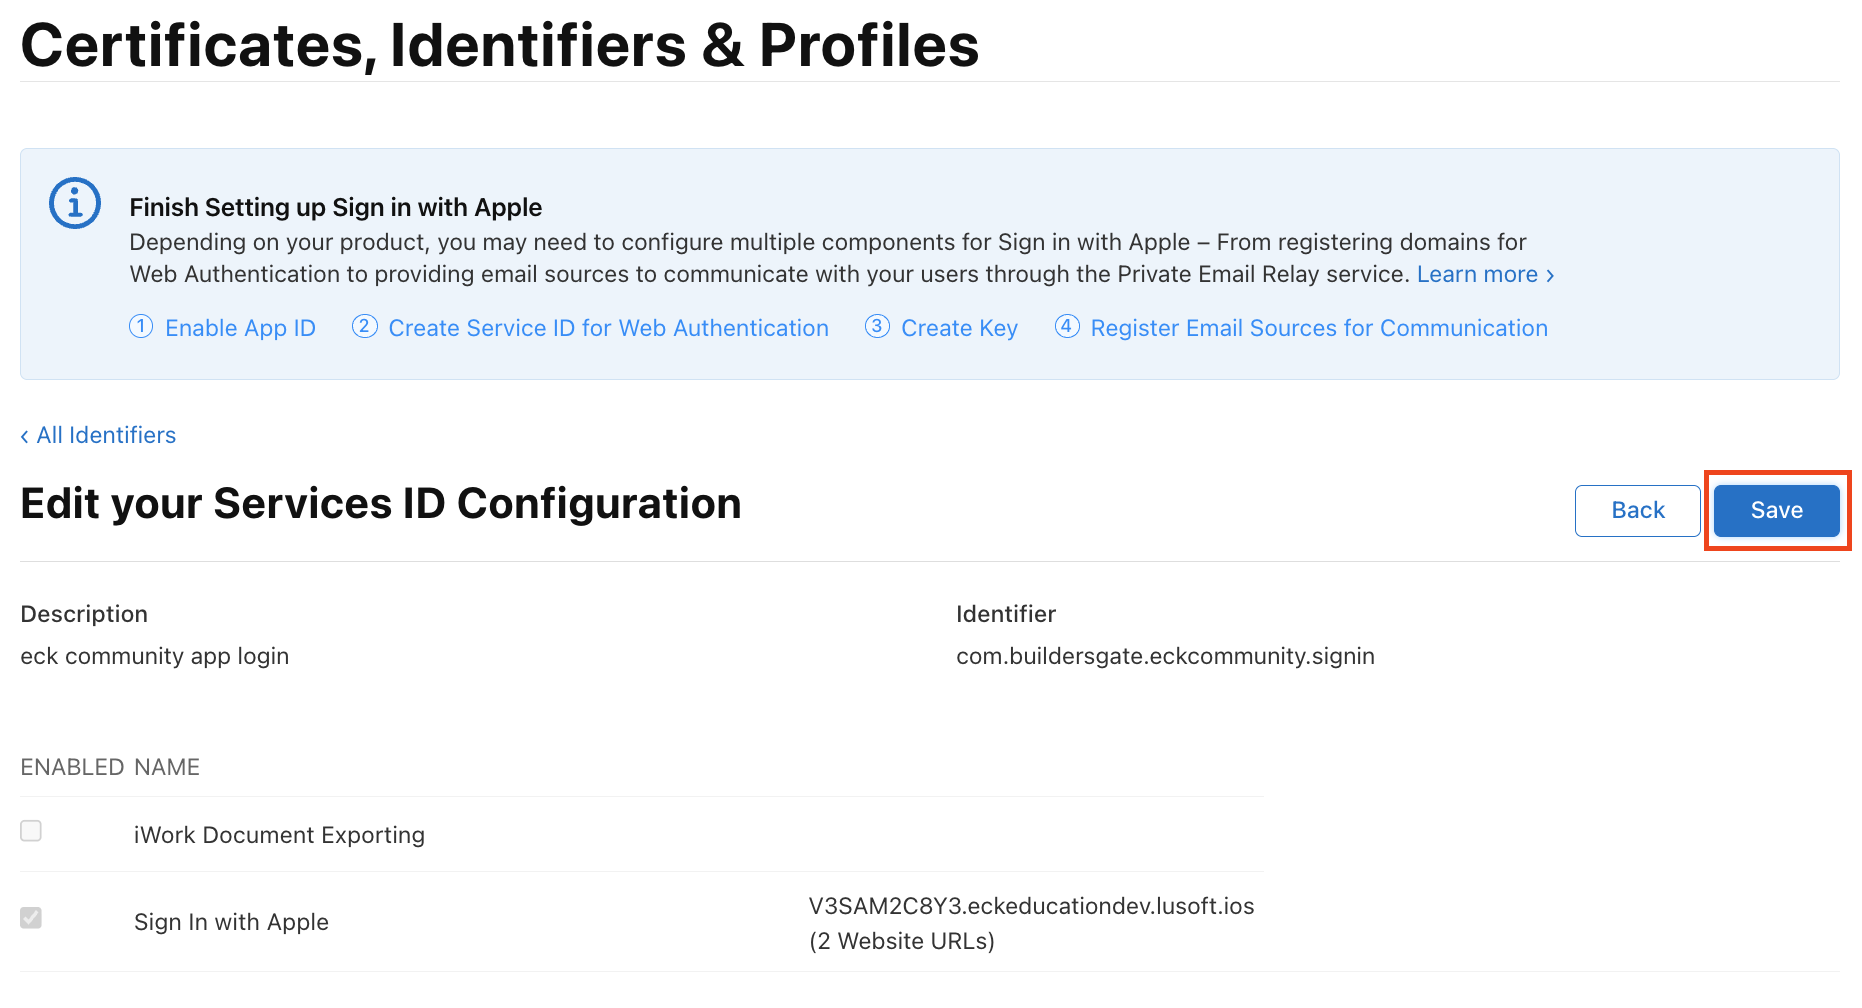
18단계: Save
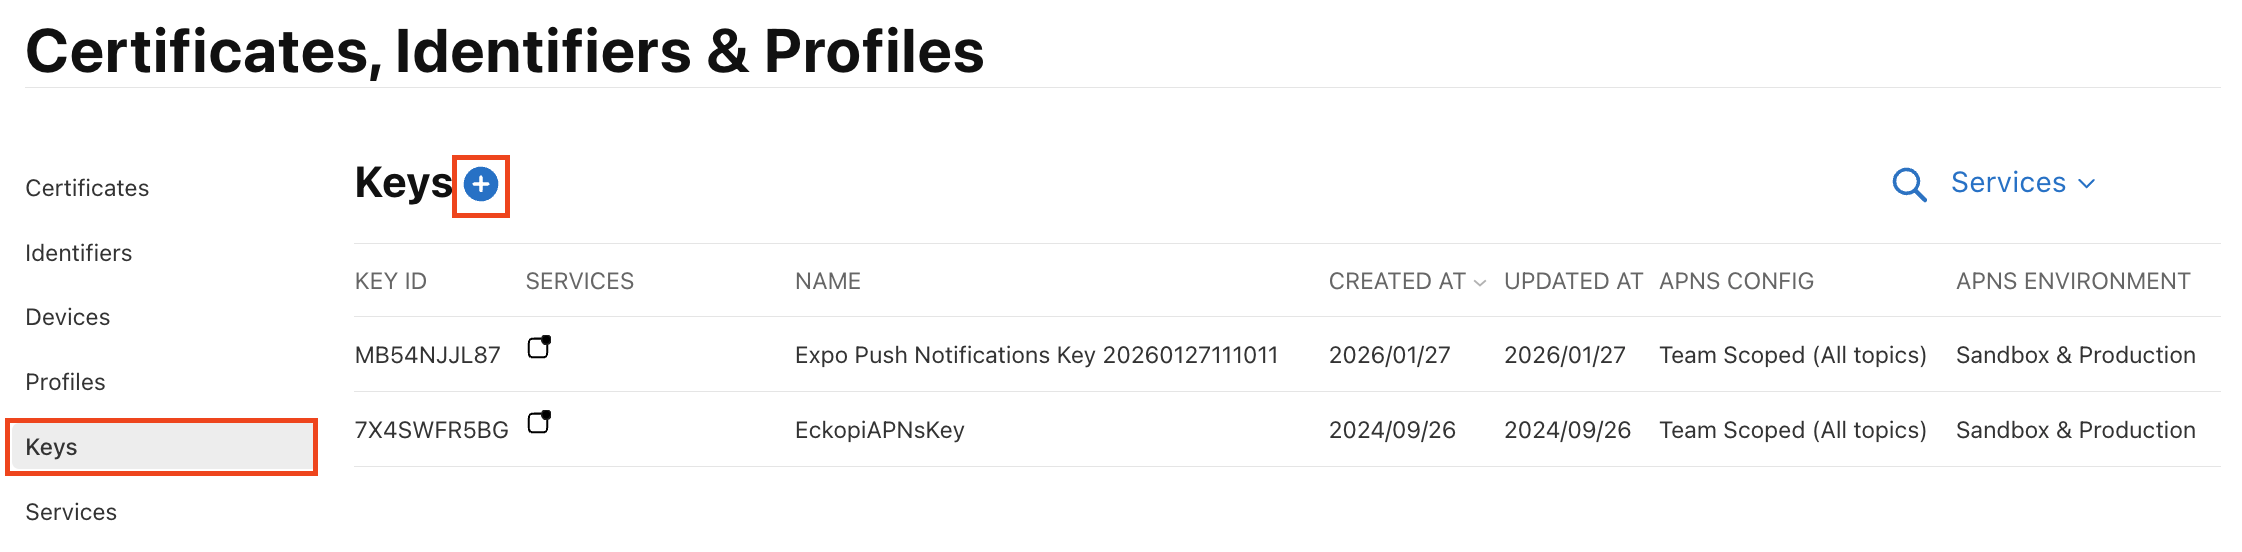
19단계: Keys - 파란색 + 버튼 클릭
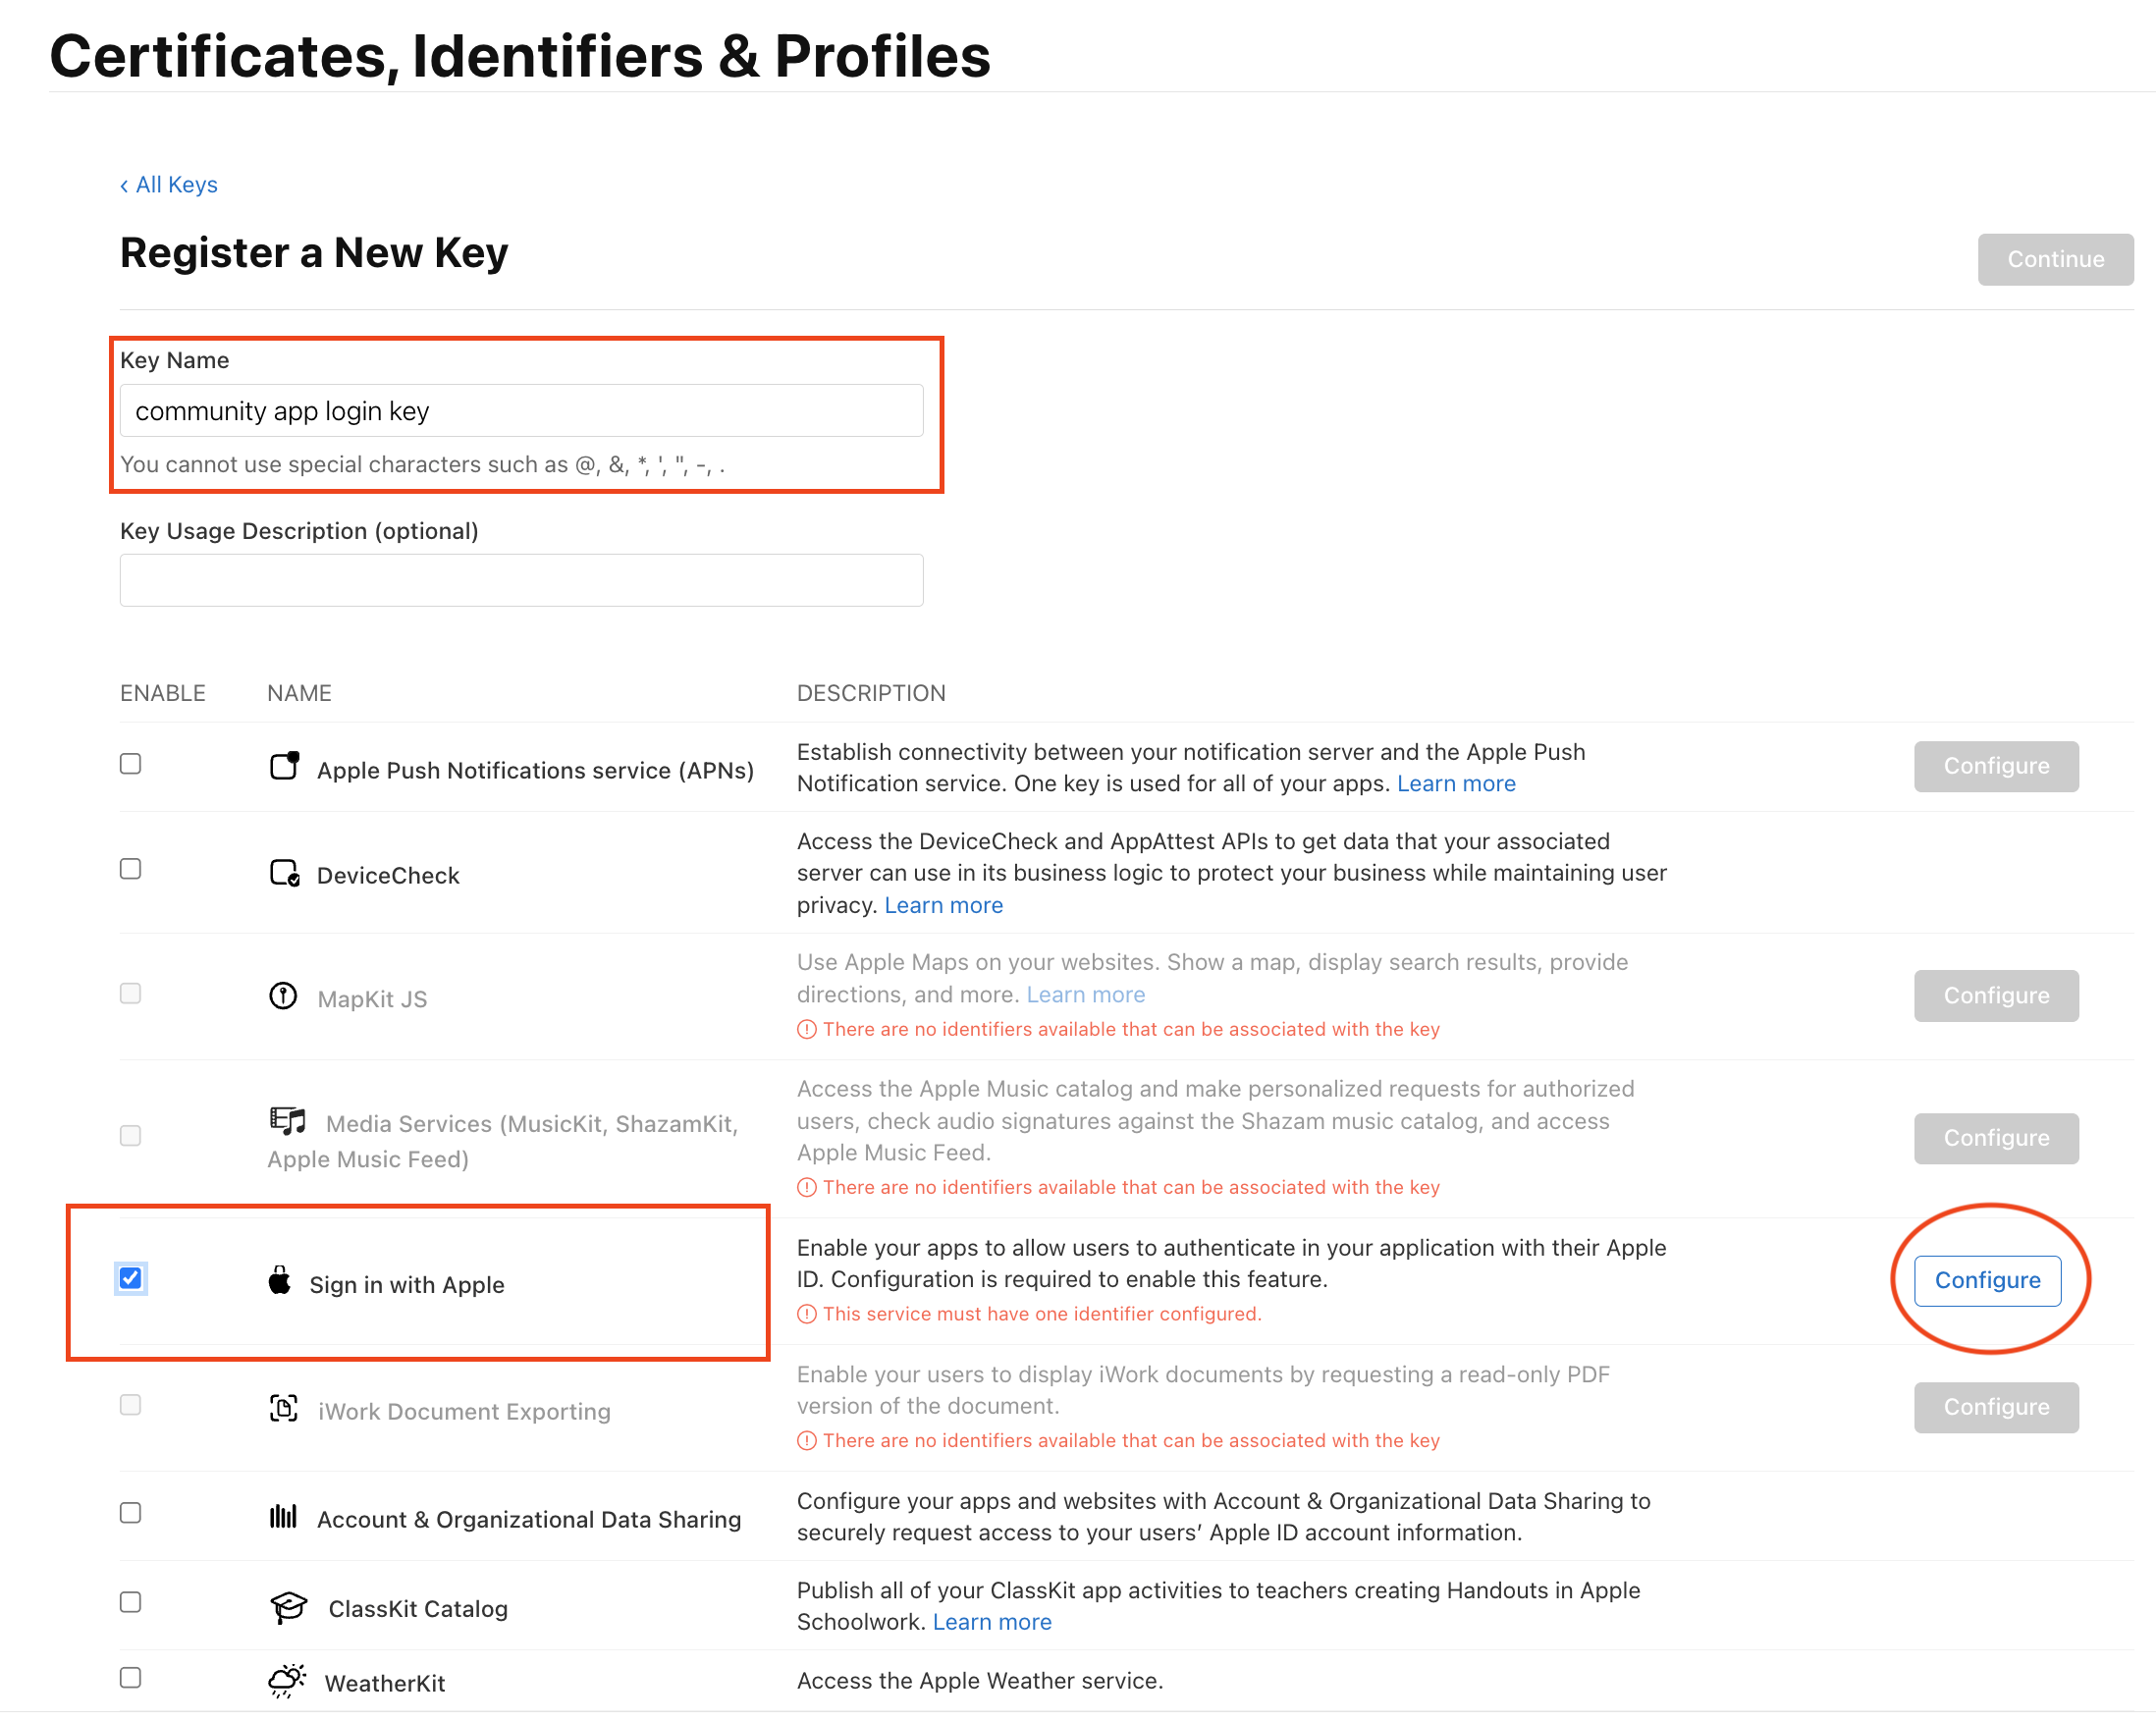
20단계: Key Name 입력 - Sign in with Apple 체크 및 Configure
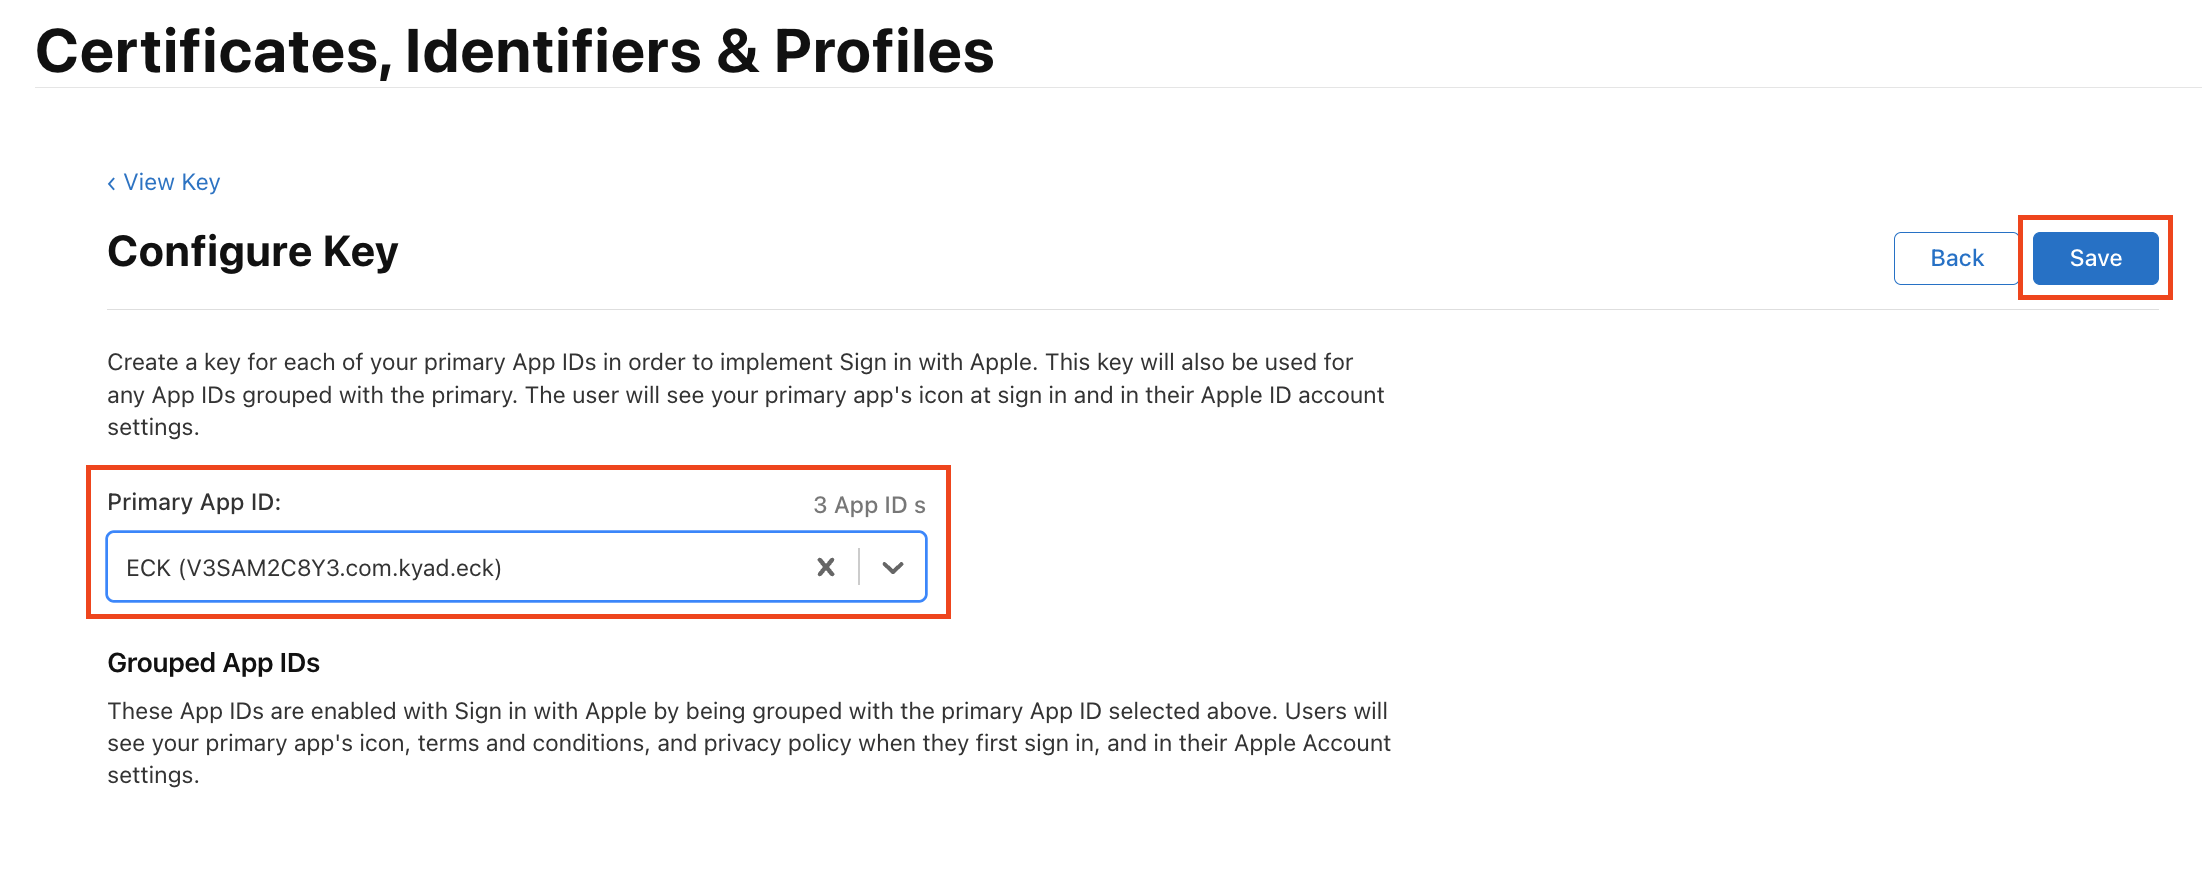
21단계: Primary App ID를 이전에 생성한 App ID 선택 - Save
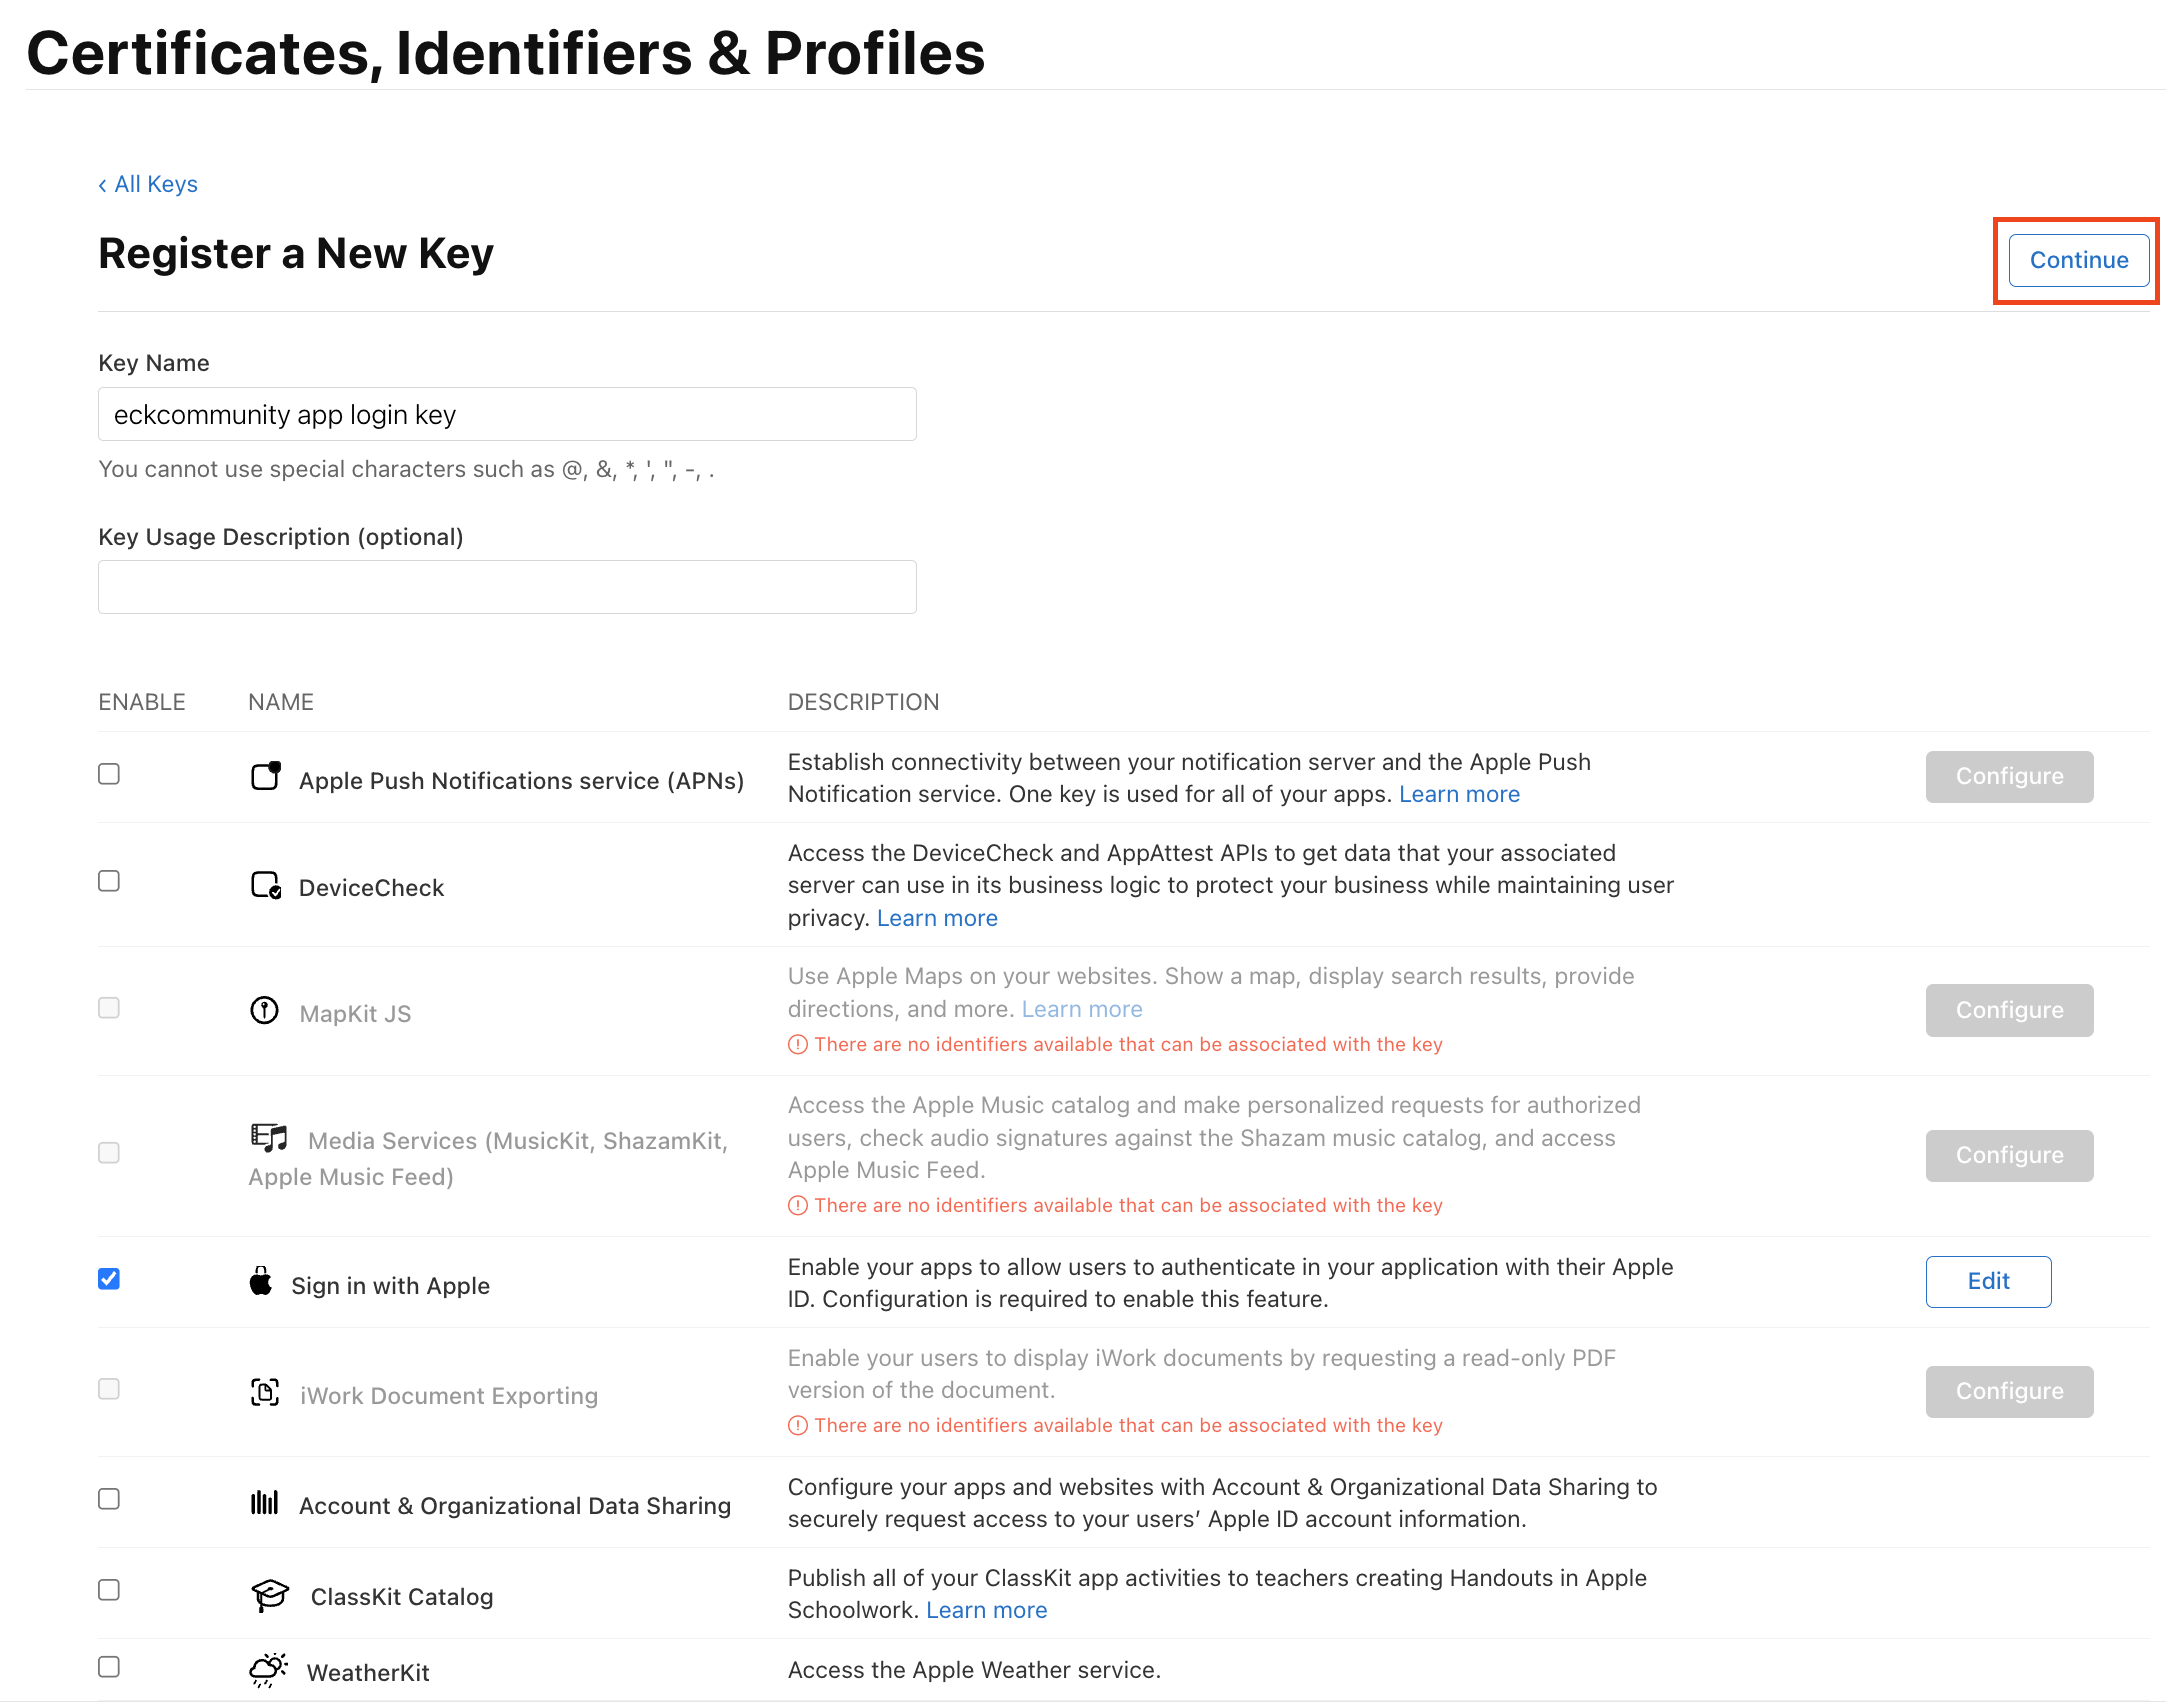
22단계: Continue
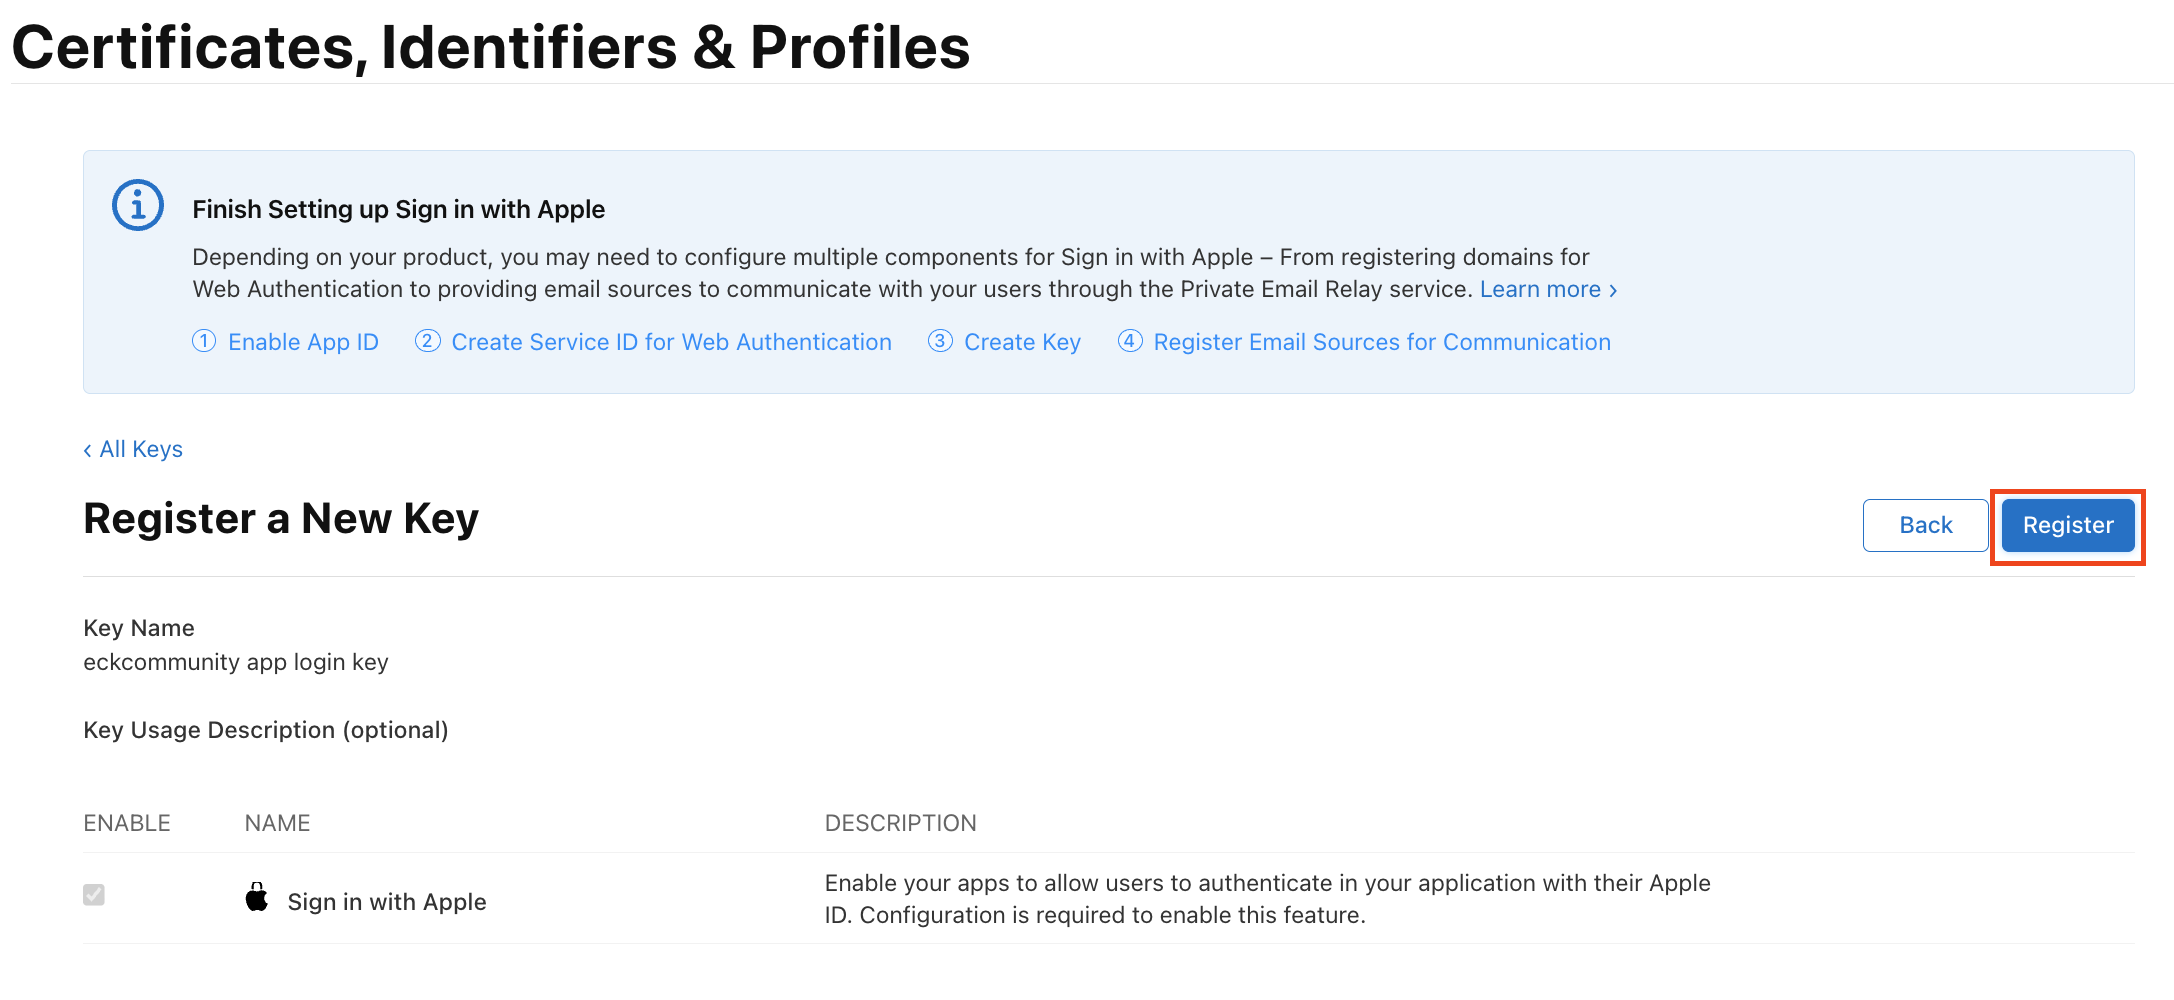
23단계: Register
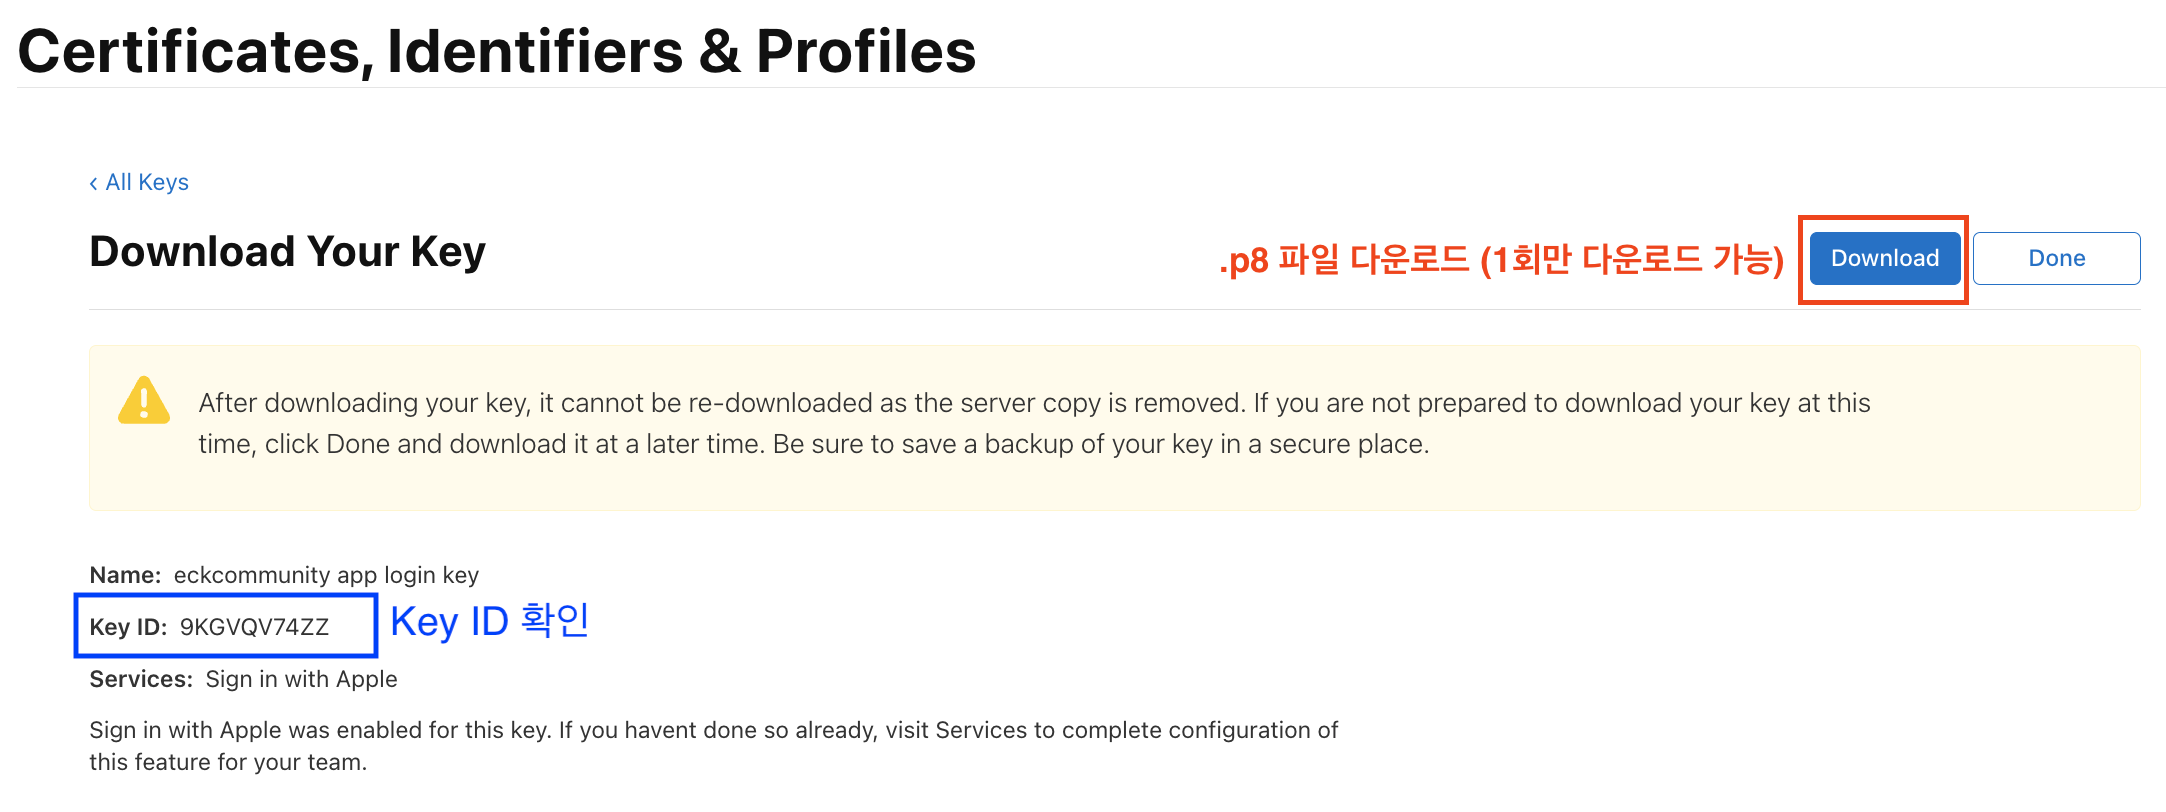
24단계: .p8 파일 다운로드
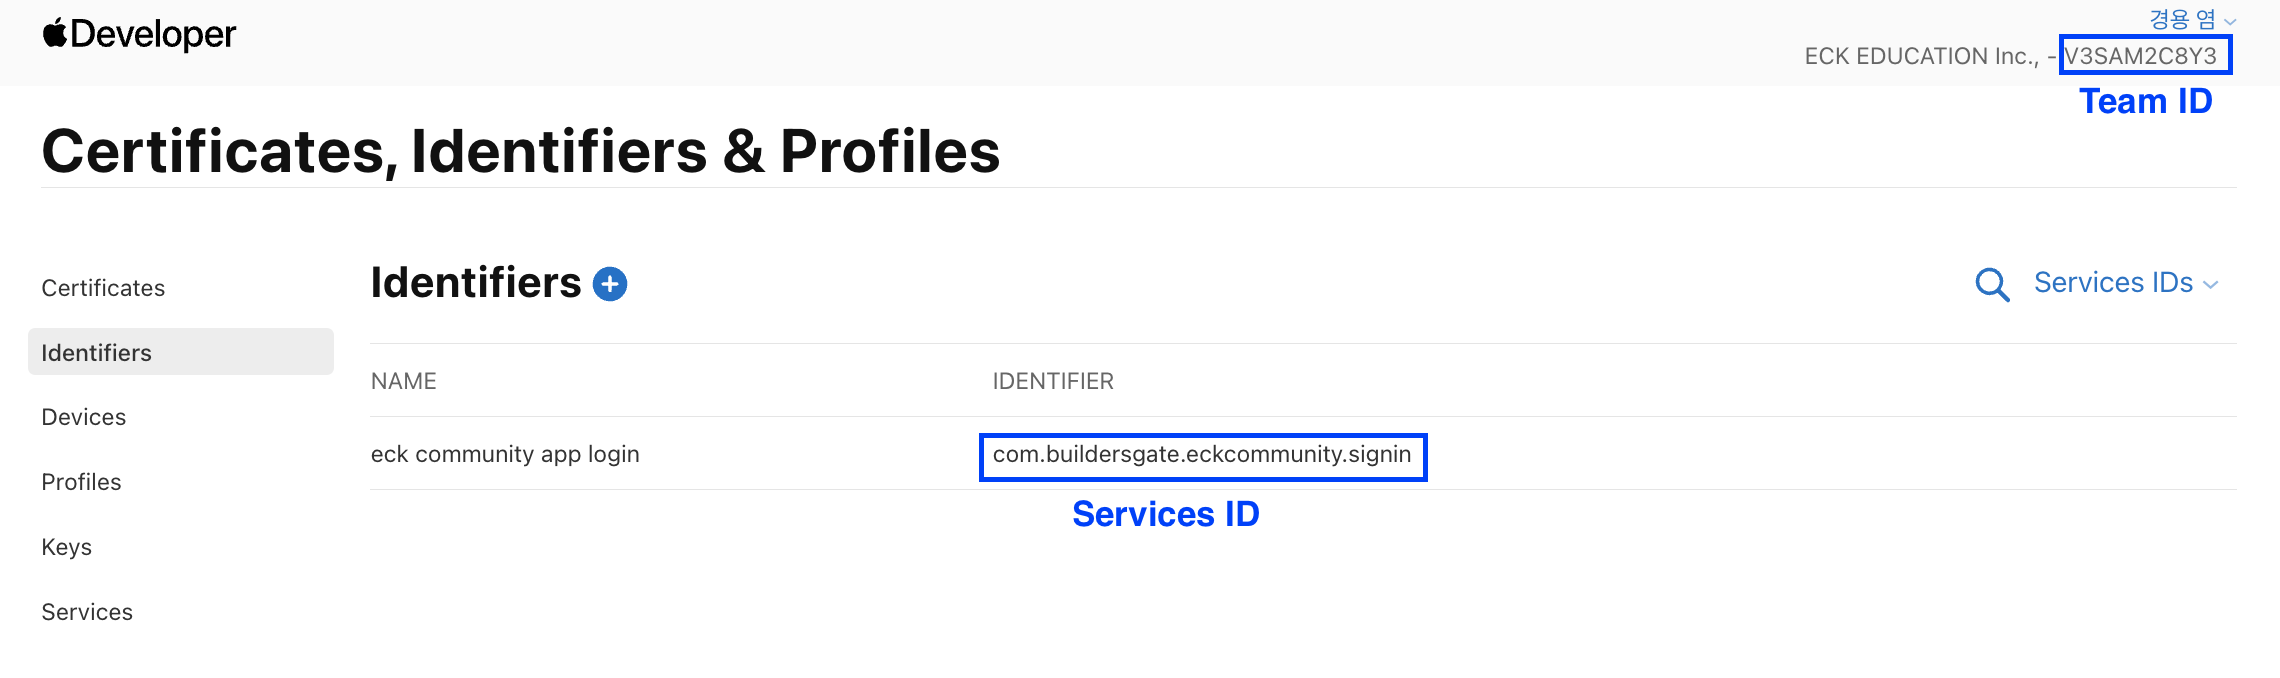
25단계: Team ID Services ID 확인
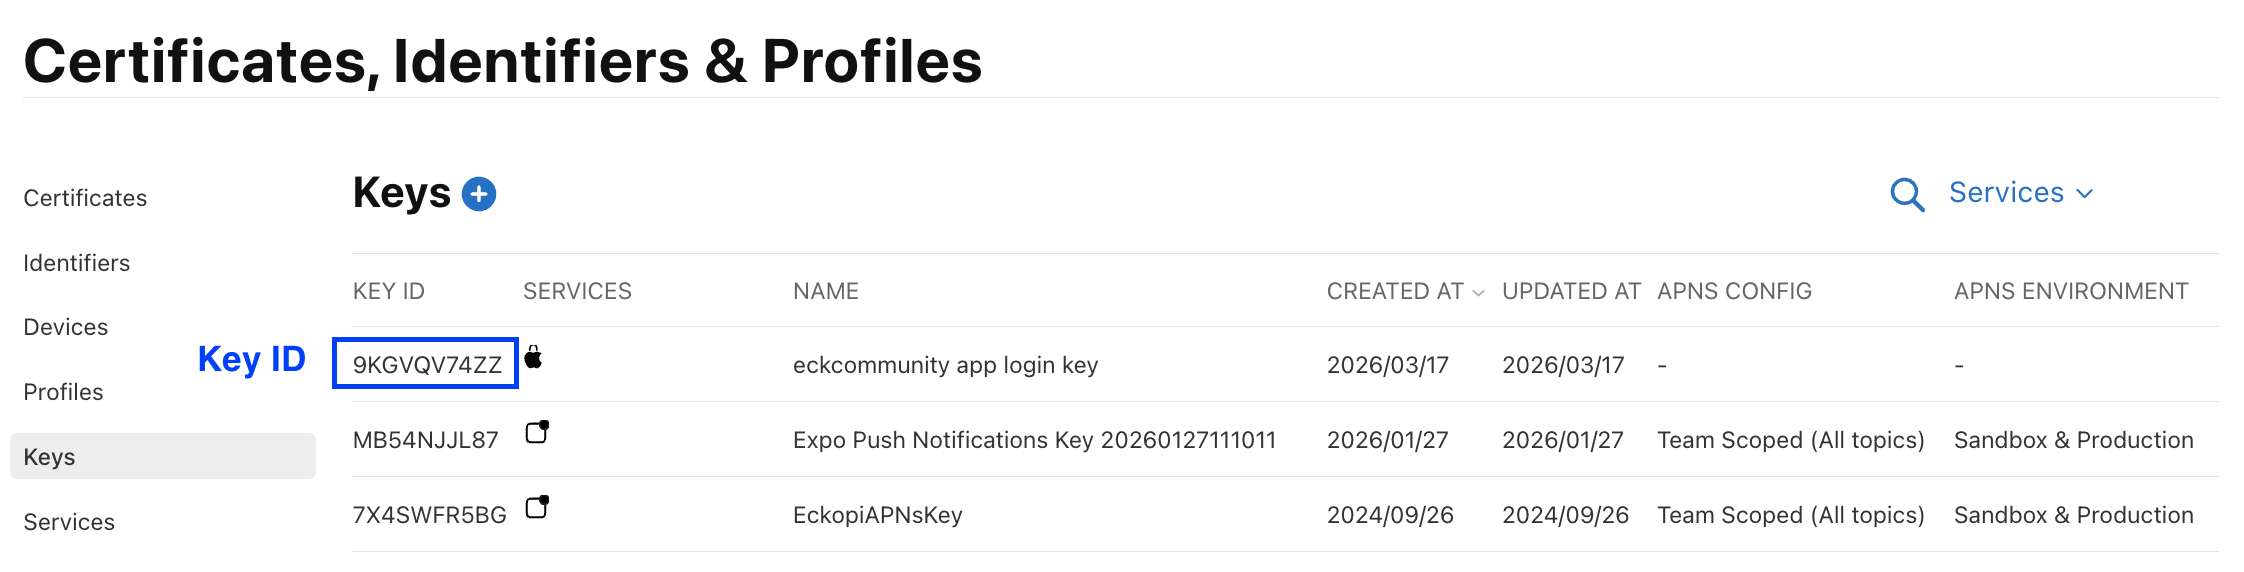
26단계: Key ID 확인
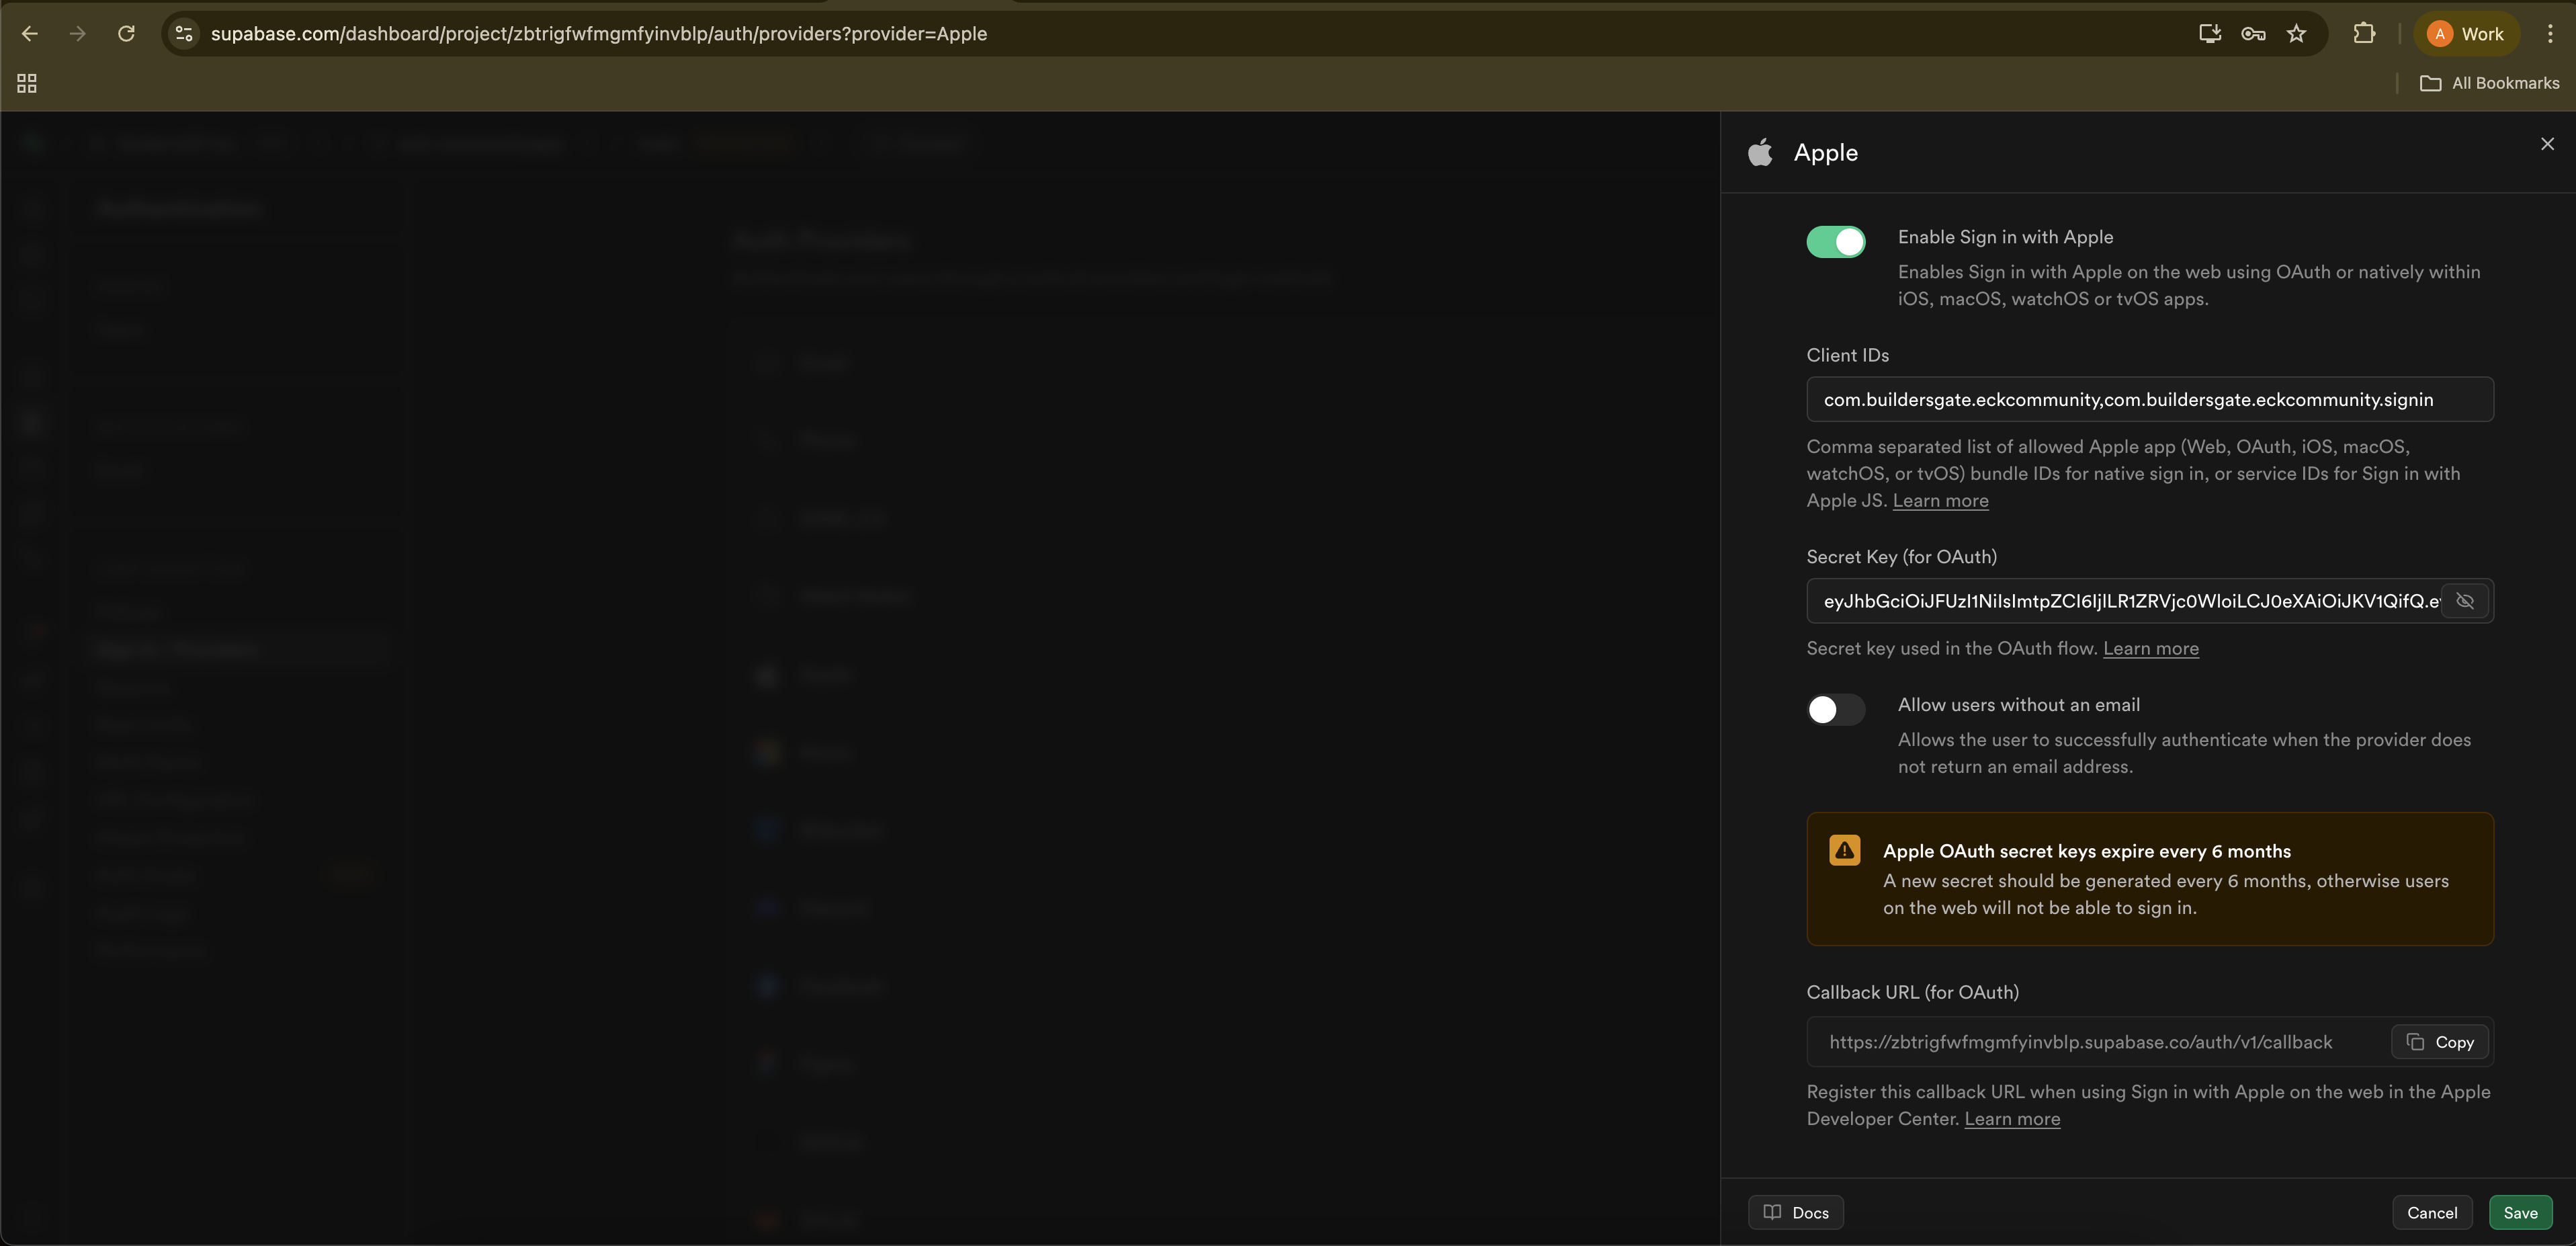
27단계: Supabase에서 해당 프로젝트 접속
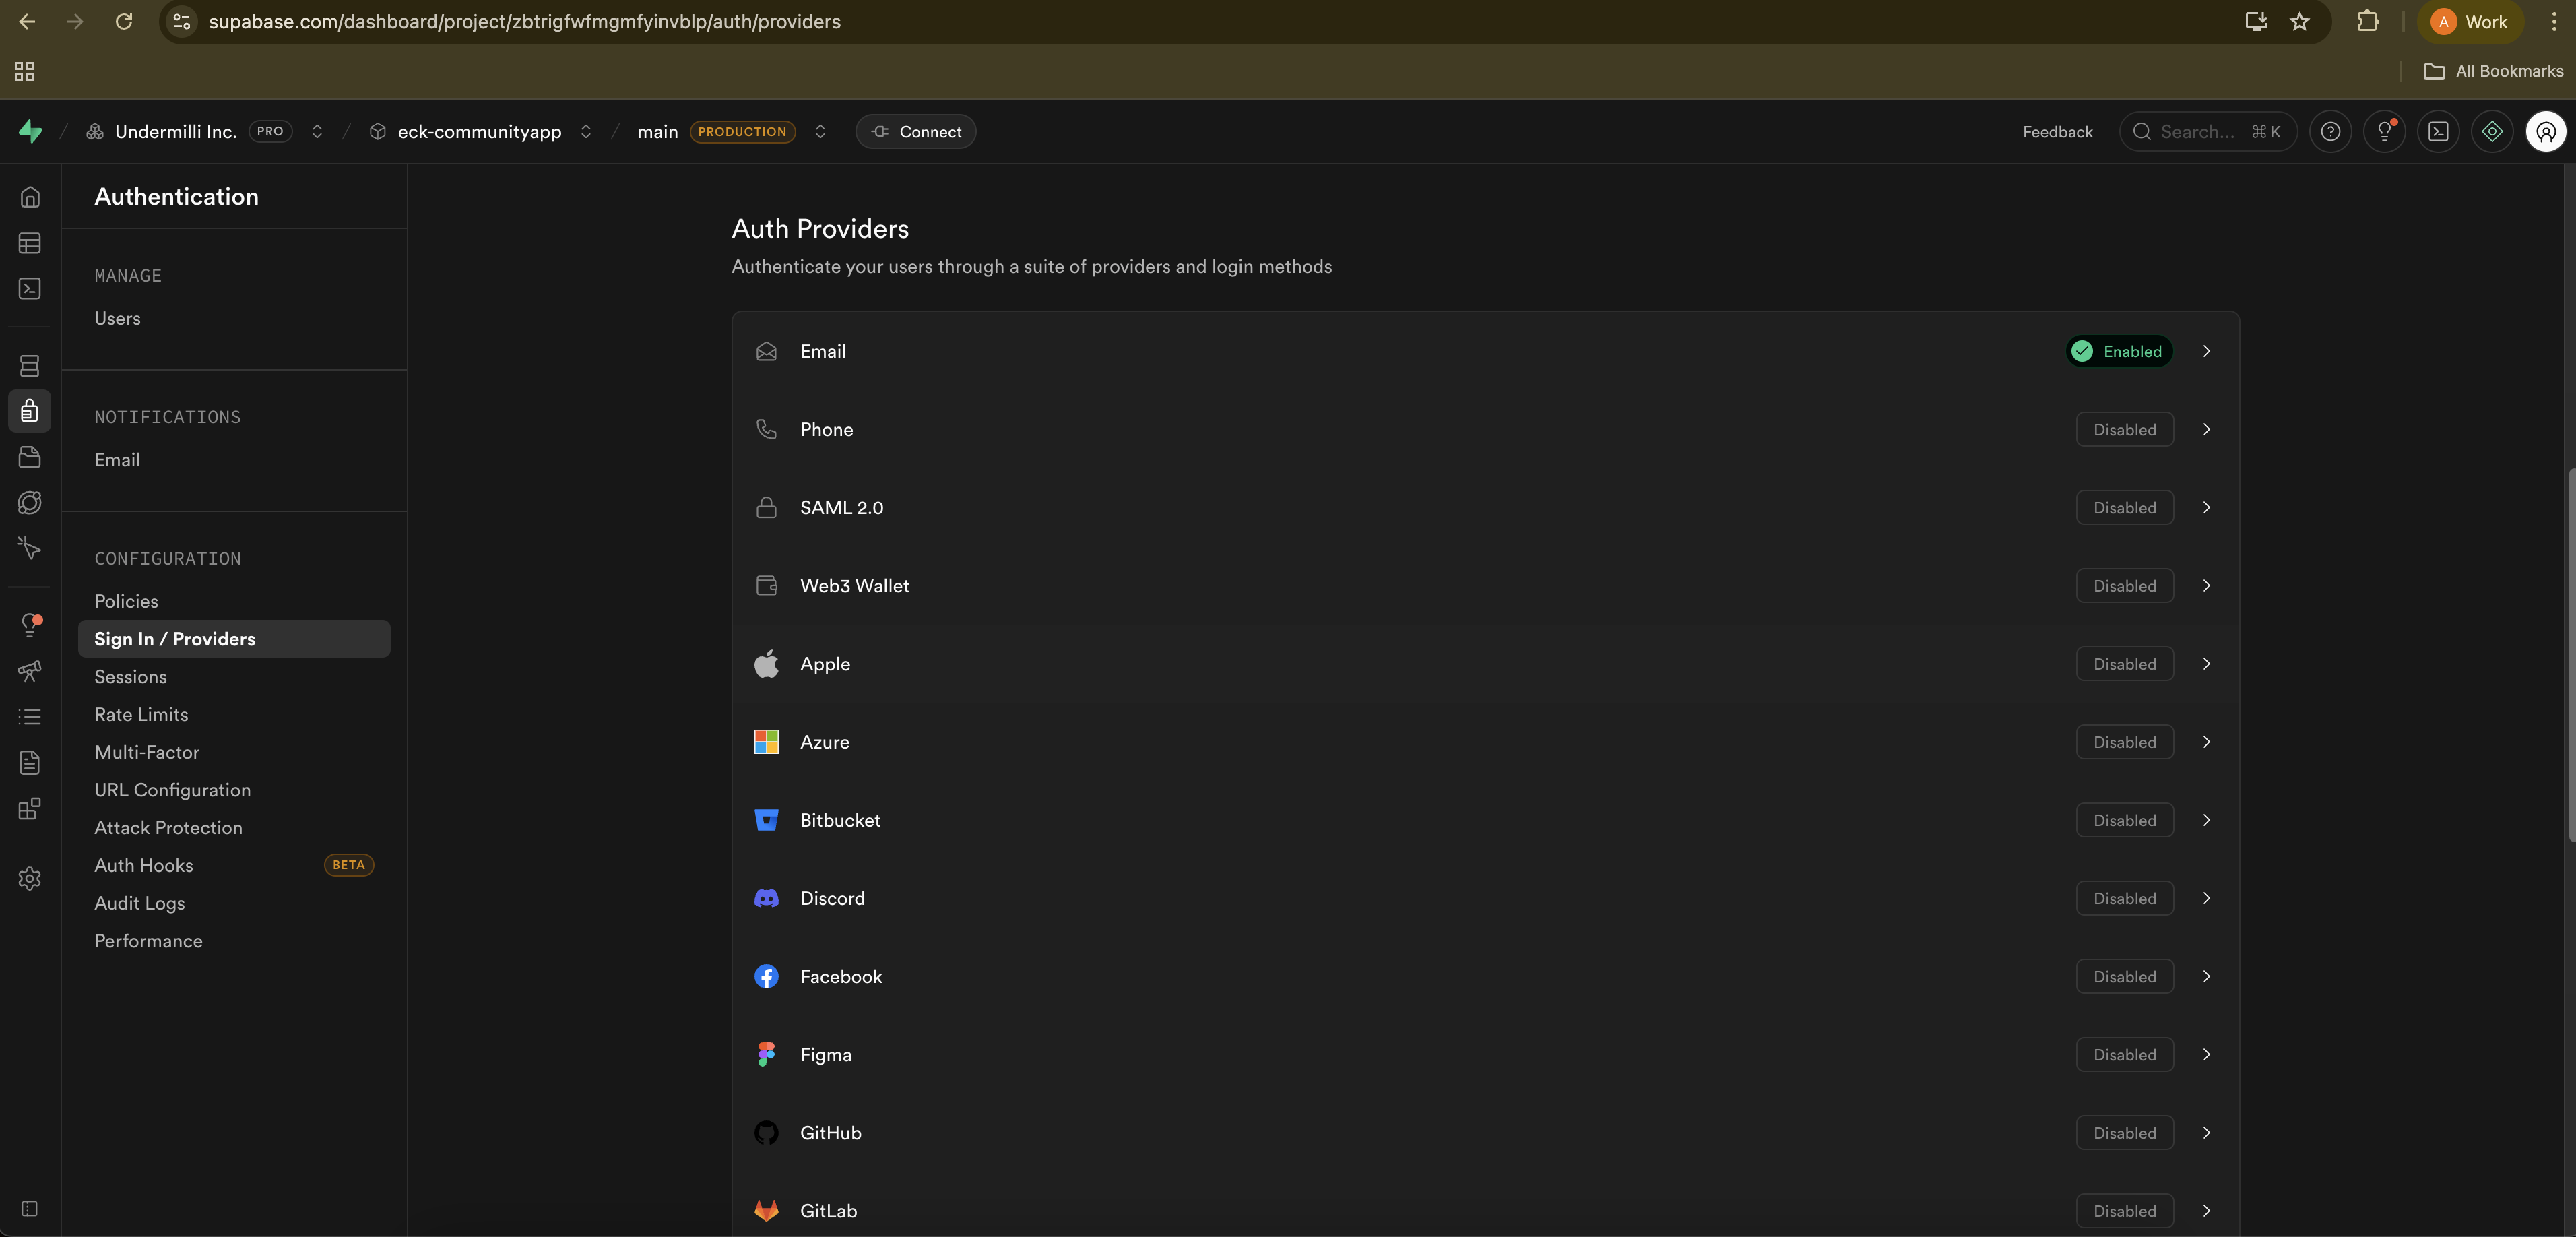
28단계: .p8 파일의 secret 키를 JWT로 생성 및 입력